Sunday, December 28, 2014

Fun with Pixel Shaders

One of the things that saved my ass for MIT Mini Maker Faire was SlimDX, a modern (.NET 4.0) replacement for Microsoft's obsolete Managed DirectX framework. I was only using it to replace the managed DirectInput wrapper I had for interfacing to USB HID joysticks for controlling Twitch and 4pcb. For that it was almost a drop-in replacement. But the SlimDX framework also allows for accessing almost all of DirectX from managed .NET code.

I've never really messed with DirectX, even though at one point long ago I wanted to program video games and 3D stuff. The setup always seemed daunting. But with a managed .NET wrapper for it, I decided to give it a go. This time I'm not using it to make video games, though. I'm using it to access GPU horsepower for simple image processing.

The task is as follows:

The most efficient way to capture and save images from my USB3.0 camera is as raw images. The file is a binary stream of 8-bit or 12-bit pixel brightnesses straight from the Bayer-masked sensor. If one were to convert these raw pixel values to a grayscale image, it would look like this:

Zoom in to see the checkerboard Bayer pattern...it's lost a bit in translation to a grayscale JPEG, but you can still see it on the car and in the sky.


The Bayer filter encodes color not on a per-pixel basis, but in the average brightness of nearby pixels dedicated to each color (red, green, and blue). This always seemed like cheating to me; to arrive at a full color, full resolution image, 200% more information is generated by interpolation than was originally captured by the sensor. But the eye is more sensitive to brightness than to color, so it's a way to sense and encode the information more efficiently.

Anyway, deriving the full color image from the raw Bayer-masked data is a bit of a computationally-intensive process. In the most serial implementation, it would involve four nested for loops to scan through each pixel looking at the color information from its neighboring pixels in each direction. In pseudo-code:

// Scan all pixels.
for y = 0 to (height - 1)
 for x = 0 to (width - 1)
  
  Reset weighted averages.  

  // Scan a local window of pixels.
  for dx = -N to +N
   for dy = -N to +N
    
    brightness = GetBrightness(x+dx, y+dy)
    Add brightness to weighted averages.
   
   next
  next

  Set colors of output (x, y) by weighted averages.

 next
next

The window size (2N+1)x(2N+1) could be 3x3 or 5x5, depending on the algorithm used. More complex algorithms might also have conditionals or derivatives inside the nested for loop. But the real computational burden comes from serially scanning through x and y. For a 1920x1080 pixel image, that's 2,073,600 iterations. Nest a 5x5 for loop inside of that and you have 51,840,000 times through. This is a disaster for a CPU. (And by disaster, I mean it would take a second or two...)

But the GPU is ideally-suited for this task since it can break up the outermost for loops and put them onto a crapload of miniature parallel processors with nothing better to do. This works because each pixel's color output is independent - it depends only on the raw input image. The little piece of software that handles each pixel's calculations is called a pixel shader, and they're probably the most exciting new software tool I've learned in a long time.

For my very first pixel shader, I've written a simple raw image processor. I know good solutions for this already exist, and previously I would use IrfanView's Formats plug-in to do it. But it's much more fun to build it from scratch. I'm sure I'm doing most of the processing incorrectly or inefficiently, but at least I know what's going on under the hood.

The shader I wrote has two passes. The first pass takes as its input the raw Bayer-masked image and calculates R, G, and B values for each pixel based on the technique presented in this excellent Microsoft Research technical article. It then does simple brightness, color correction, contrast, and saturation adjustment on each pixel. This step is a work-in-progress as I figure out how to define the order of operations and what techniques work best. But the framework is there for any amount of per-pixel color processing. One nice thing is that the pixel shader works natively in single-precision floating point, so there's no need to worry about bit depth of the intermediate data for a small number of processing steps.


The second pass implements an arbitrary 5x5 convolution kernel, which can be used for any number of effects, including sharpening. The reason this is done as a second pass is because it requires the full-color output image of the first pass as its input. It can't be done as part of a single per-pixel operation with only the raw input image. So, the first pass renders its result to a texture (the storage type for a 2D image), and the second pass references this texture for its 5x5 window. The output of the second pass can either be rendered to the screen, or to another texture to be saved as a processed image file, or both.

What a lovely Seattle winter day.
Even though the pixel shader does all of the exciting work, there's still the matter of wrapping the whole thing in a .NET project with SlimDX providing the interface to DirectX. I did this with a simple VB program that has a viewport, folder browser, and some numeric inputs. For my purposes, a folder full of raw images goes together as a video clip. So being able to enumerate the files, scan through them in the viewer, and batch convert them to JPEGs was the goal.

Hrm, looks kinda like all my other GUIs...

As it turns out, the pixel shader itself is more than fast enough for real-time (30fps) processing. The time consuming parts are loading and saving files. Buffering into RAM would help if the only goal was real-time playback, but outputting to JPEGs is never going to be fast. As it is, for a 1920x1200 image on my laptop, the timing is roughly 30ms to load the file, an immeasurably short amount of time to actually run both pixel shader passes, and then 60ms to save the file. To batch convert an entire folder of 1000 raw images to JPEG, including all image processing steps, took 93s (10.75fps), compared to 264s (3.79fps) in IrfanView.

Real-time scrubbing on the MS Surface Pro 2, including file load and image processing, but not including saving JPEGs.

There are probably ways to speed up file loading and saving a bit, but even as-is it's a good tool for setting up JPEG image sequences to go into a video editor. The opportunity to do some image processing in floating point, before compression, is also useful, and it takes some of the load off the video editor's color correction.

I'm mostly excited about the ability to write GPU code in general. It's a programming skill that still feels like a superpower to me. Maybe I'll get back into 3D, or use it for simulation purposes, or vision processing. Modern GPUs have more methods available for using memory that make the cores more useful for general computing, not just graphics. As usual with new tools, I don't really know what I'll use it for, I just know I'll use it.

If you're interested in the VB project and the shader source (both very much works-in-progress), they are here:

VB 2012 Project: RawView_v0_1.zip
Built for .NET 4.0 64-bit. Requires the SlimDX SDK.

HLSL Source: debayercolor.fx

P.S. I chose DirectX because it's what I have the most experience with. (I know somebody will say, "You should use OpenGL.") I'm sure all of this could be done in OpenGL / GLSL as well.

Sunday, October 19, 2014

MIT Mini Maker Faire 2014

I made a quick trip back to Boston/Cambridge for the first ever MIT Mini Maker Faire. Recap and pictures below, but first here is some video from the event:


As expected from an MIT Maker Faire, there were lots of electric go-karts, Tesla coils, 3D printers, robots, and...

Chainsaw...pink scooter...things.
To this I contributed a set of long-time Maker Faire veteran projects (Pneu Scooter, 4pcb, Twitch) and a couple of new things (Talon v2 multirotor, Grasshopper3 Camera Rig). I always like to bring enough projects that if some don't work or can't be demonstrated, I have plenty of back-ups. Fixing stuff on the spot isn't really possible when you have a constant stream of visitors. But I've been to a number of Maker Faires and decided the maximum number of projects I can keep track of is five. Especially since this time I had to be completely mobile, as in airline mobile.

Arriving at the venue, MIT's North Court, luggage in the foreground, MIT Stata Center in the background.
The travel requirement meant that, unfortunately, tinyKart transport was out. (Although it is theoretically feasible to transport it for free via airline except for the battery and the seat...) But Pneu Scooter is eminently flyable and in fact has been all over the world in checked baggage already. It collapses to about 30" long and weighs 18lbs. The battery is well within TSA travel limits for rechargeable lithium ion batteries installed in a device. Oh, and Twitch fits right between the deck and the handlebar:

It was definitely designed that way...
Pneu Scooter and Twitch are really all I should ever bring to Maker Faires. They are low-maintenance and very reliable; both have survived years of abuse. In fact, Pneu Scooter is almost four year old now...still running the original motor and A123 battery pack, and still has a decent five-mile range. (I range-tested it before I left.) It's been through a number of motor controllers and wheels though. Because the tires are tiny, it's always been a pain in the ass accessing the Schrader valves with normal bike pumps. Turns out it just took five minutes of Amazon Googling (Is that a thing?) to solve that problem:

Right-angle Schrader check valve. Why Have I not had this forever?
Pneu Scooter survived the rainy Faire with no issues - it's been through much worse. I participated in the small EV race featuring 2- and 3-wheel vehicles. Unfortunately I didn't get any video of it, but Pneu Scooter came in third or something...I wasn't keeping track and nobody else was either. Mostly I was occupied by trying to avoid being on the outside of the drift trike:

Yes, those red wheels are casters...
But if I had to pick one project that I could pretty much singly count on for Maker Faire duty, it's Twitch.


Despite the plastic Vex wheels, Twitch has been pretty durable over the years. I had planned to spend a few days rebuilding it since I thought one of the motors was dead, but when I took it off the shelf to inspect, it was all working fine. In fact, the only holdup for getting it Faire-ready was that the Direct Input drivers I have been using since .NET 1.0 to read in Twitch's USB gamepad controller are no longer supported by Windows 7/8. Yes, Twitch outlasted a Microsoft product lifecycle... Anyway, after much panic, I found a great free library called SlimDX that offers an API very similar to the old Managed Direct X library, so I was back in action.


Basically, Twitch is an infinite source of entertainment. I spent a lot of the Faire just driving it around the crowd from afar and watching people wonder if it's autonomous... I would also drive it really slowly in one orientation, wait for a little kid to attempt to step on it (they always do), and then change it to the other orientation and dart off sideways. And then there is just the normal drifting and driving that is unlike any other robot most people have seen. I found an actual use for the linkage drive too - when it would get stuck with two wheels on pavement and two wheels on grass, it was very easy to just rotate the wheels 90º and get back on the walkway. Seattle drivers need this feature for when it snows...


Twitch is definitely my favorite robot. Every time I take it out, it gets more fun to drive. I have 75% of the parts I need to make a second, more formidable version... This Maker Faire was enough to convince me that it needs to be finished.

4pcb was a bit of a dud. I don't know if my standards for flying machines have just gotten higher or if it always flew as bad as it did during my pre-Faire flight test. It still suffers from a really, really bad structural resonance that kills the efficiency and messes with the gyros.


It was one of the first, or maybe the first PCB quadrotor with brushless motor drivers. But the Toshiba TB6588FG drivers are limited in what they can do, as is the Arduino Pro Mini that runs the flight control. Basically, it's time for a v2 that leverages some new technology and also improves the mechanical design - maybe going to 5" props as well. We'll see...

And unfortunately, because of the rain and crowds, I didn't get to do any aerial video with my new Talon copter. But it looks good and works quite nicely, for a ~$300 all-up build. (Not including the GoPro.) Here's some video I shot with my dad in North Carolina that I had queued up to show people at the Faire.

Talon v2, son of Kramnikopter.
Electric linkage drive scooter drone...fund my Kickstarter plz.
The last thing I brought for the Faire was my Grasshopper 3 camera setup with the custom recording software I've been working on for the Microsoft Surface. With this and the Edgerton Center's new MōVI M5, I got to do a bit of high speed go-kart filming and other Maker Faire documentation. The videos above were all created with this setup.

I had a stand, but this seemed easier at the time...
As a mobile, stabilized, medium-speed camera (150fps @ 1080p), it really works quite nicely. I know the iPhone 6+ now has slow-mo and O.I.S., but it's way more fun to play with gimbals and raw 350MB/s HD over USB3. Of course it meant I had 200GB of raw video to go through by the end of the Faire. I did all of the video editing in Lightworks using a JPEG timeline. (Each frame is a JPEG in a folder...somehow it manages to handle this without rendering.)


And that's pretty much it. It was much like other Maker Faires I've been to: lots of people asking questions with varying degrees of incisiveness ("Is that a drone?"), crazy old guys who come out right before the Faire ends to talk to you about their invention, and little kids trying to ride or touch things that they shouldn't be trying to ride or touch while their parents encourage them. Although I did get one or two very insightful kids who came by on their own and asked the most relevant questions, which gives me hope for the future. It was great to return to Cambridge and see everyone's cool new projects as well.

My MIT Maker Faire 2014 fleet by the numbers:
Projects: 5
Total Weight: ~75lbs
Total Number of Wheels: 6 (not including omniwheel rollers)
Total Number of Props: 8
Total Number of Motors: 18 (not including servos), 1 of my own design
Total Number of Motor Controllers: 18 (duh...), 16 of my own design!
Total Number of Cameras: 2

And here are some more pictures from the Faire:

Clearscooter...
I'm not sure what this is.
Dane's segboard, Flying Nimbus, which I got to ride. It actually has recycle Segstick parts!
Good old MITERS, where you can't tell where the shelves end and the floor begins!
Ed Moviing. I finally figured out a good way to power wireless HD transmitters...can you see?
A small portion of the EVs, lining up for a picture or a race or something.
Of course there were Tesla coils.
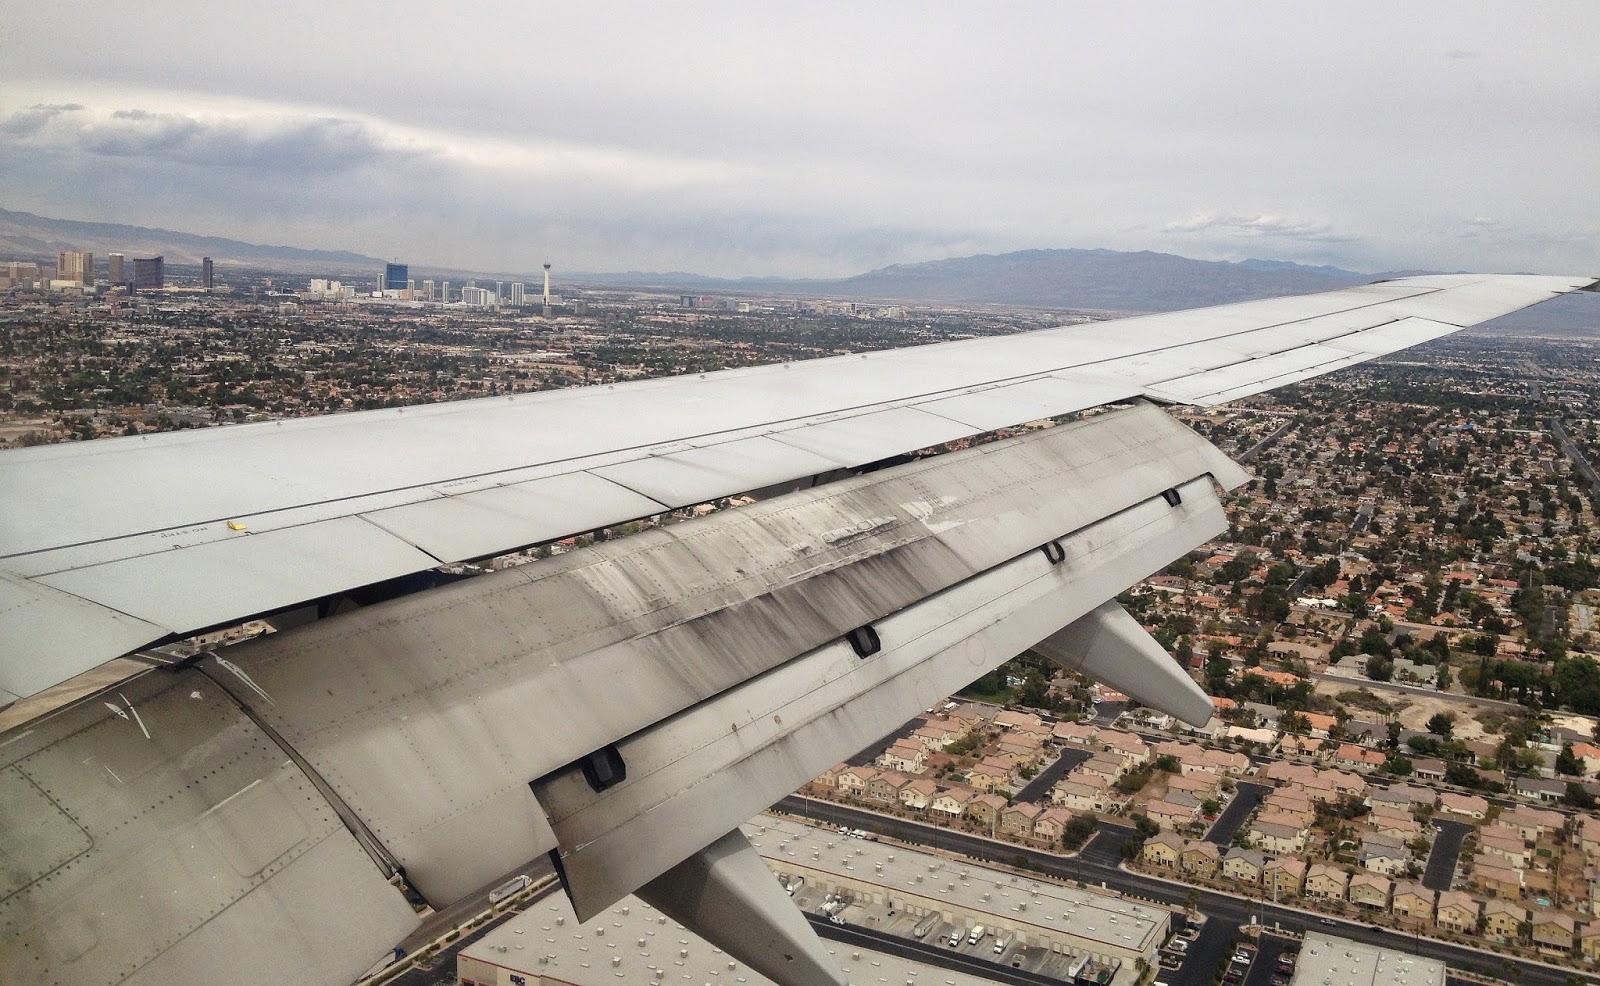
Flying out of Boston after the Faire, got a great Sunday morning view.

Sunday, September 7, 2014

Grasshopper3: Circular Buffer, Post Triggering, and Continuous Modes

Previously I have implemented a bare-bones RAM buffering program for the Grasshopper3 USB3 camera. The idea was to strip out all operations other than transferring raw image data from the USB3 port to RAM, so that the full frame rate of the camera can be buffered even on a Microsoft Surface2 tablet. While the RAM buffer is filling, no image conversion or saving to disk operations are going on. The GUI is running on another thread, and the image preview rate is held to 30Hz.

One-shot linear buffer with pre-trigger: 1) After triggering, frames are transferred into RAM (yellow). 2) RAM buffer is full. 3) Images are converted and saved to disk (not in real-time).
At the time I also tried to implement a circular buffer, where the oldest images are continuously overwritten in RAM. This allows for post-triggering, a common feature of high-speed cameras. The motivation for post-triggering is that the buffer is short (order of seconds) but you don't know when the exciting thing is going to happen. So you capture image data at full frame rate, continuously overwriting the oldest images in the buffer, until something exciting happens. The trigger can come after the action, stopping the image data capture and locking the previous N image frames in the buffer. The entire buffer can then be saved starting from the oldest image and ending at the trigger.

Circular buffer with post-trigger: 1) Buffer begins filling with frames. 2) After full, the oldest frame is overwritten with the newest. 3) A post-trigger stops buffering new frames and starts saving the previous N frames to disk.
It didn't work the first time I tried it; the frame rate would drop after the first time through the buffer. But I did a little code cleanup - now the first time through it constructs the array elements that make up the frame buffer, but on subsequent passes it assumes the structures are already in place and just transfers in data. This makes a wonderful flat-top trapezoidal wave of RAM usage that corresponds exactly with the allocated buffer size:


Post-triggering is not the only thing a circular buffer structure is good for. It can also be used as the basis for robust (buffered) continuous saving to disk. Assuming a fast enough write speed, frames can be continuously taken out of the buffer on a First-In First-Out (FIFO) basis and written to disk. I say "disk" but in order to get fast enough write speeds it really does need to be a solid-state drive. And even then it is a challenge.

For one, the sequential write speed of even the fastest SSDs struggles to keep up with USB3. To achieve maximum frame rate, the saved images must be in a raw format, both to keep the size down (one color per pixel, not de-Bayered) and to avoid having the processor bottleneck the entire process during image conversion. Luckily there is an option to just spit out raw Bayer data in 8- or 12-bit-per-pixel formats. IrfanView (my favorite image viewer) has a plug-in that is capable of parsing and color-processing raw images. The plug-in also works with the batch conversion portion of IrfanView, so you can convert an entire folder of raw frames.

The other challenge is that the operations required to save to disk take up processor time. In the FlyCap2 software that comes with the camera, the image capture loop has no trouble running at full frame rate, but turning on the saving operation causes the frame processing rate to drop on my laptop and especially on the MS Surface 2. To try to combat this problem, I did something I've never done before: actually intentionally write a multi-threaded application the right way. The image capture loop runs on one thread while the save loop runs on a separate thread. (And the GUI runs on an entirely different thread...) This way, a slow-down on the saving thread ideally doesn't cause a frame rate drop on the capture thread. The FIFO might fill up a little, but it can catch up later.

Continuous saving: Images are put into the RAM buffer on one thread (yellow) and removed from it to write to disk on another thread (green). This happens simultaneously and continuously as long as the disk write can keep up.
There's another interesting twist to the continuous-saving circular buffer: the frame rate in doesn't necessarily have to equal the frame rate out. For example, it's possible to buffer into RAM at 150fps but save only every 5th frame, for 30fps output. Then, if something exciting happens, the outgoing rate can be switched to 150fps temporarily to capture the high-speed action. If the write-to-disk thread can't keep up, the FIFO grows in size. As long as the outgoing rate is switched back to 30fps before the buffer is full, the excess FIFO elements can be unloaded later.

The key parameter for this continuous saving mode is the number of frames of delay between the incoming and the outgoing thread. The target delay could be zero, but then you would have to know in advance if you want to switch to high-speed saving. Setting the target delay to some number part-way through the buffer allows for post-triggering of the high-speed saving period, which seems more useful. I added a buffer graphic to the GUI to show both the target and the actual saving delay during continuous saving. My mind still has trouble thinking about when to turn the frame rate divider on and off, but I think it could be useful in some cases.

Here's some video I took to try out these new modes. It's all captured on the Microsoft Surface 2, so no fancy hardware required and it's all still very portable.


This is a simple test of the circular buffer at 1080p150 with post-trigger. The coin in particular is a good example of when it's nice to just leave the buffer running and post-trigger after a lucky spin gets the coin to land in frame.


More coin spinning, but this time using the continuous saving mode. Frames go into RAM at 150fps, but normally they are only written to disk at 30fps. When something interesting happens (such as the coin actually being in frame...), a burst of 150fps writing to disk is triggered. On the Surface 2, the write thread is slower than the read thread, so it can only proceed for a little while until the FIFO gets too full. Switching back to 30fps saving allows the FIFO to catch up.


Finally. a quick test of lower resolution / higher frame rate operation. At 480p, the frame rate can get up to 360+ fps. Buffering is fine at this frame rate (the overall data rate is actually lower). It actually doesn't require an insane amount of light either - the iPhone display is the only source of light here. You can see its IR proximity sensor LED flashing, as well as individual frame transitions on the display, behind the water stream. The maximum frame rate goes all the way up to 1100+ fps at 120p, sometime I have yet to try out.

That's it for now. The program (which started out as the FlyCapture2SimpleGUI source that comes with the camera) has a nice VC# GUI:


I can't distribute the source since it's derived from the proprietary SDK, but now you know it's possible and relatively easy to get it to capture and save efficiently with a bit of good programming. It was a fun project since I've never intentionally written interacting multi-threaded programs, other than maybe separating GUI threads from other things. I guess I'm only ten years or so behind on my application programming skills now...

Monday, May 5, 2014

Grasshopper3 Mobile Setup

I've now got a complete mobile setup working for the Grasshopper3 camera that I started playing with last week, and I took it for a spin during the Freefly company barbecue. (It's Seattle, so barbecues are indoor events. And it's Freefly, so there are RC drift cars everywhere.)


Since the camera communicates to a Windows or Linux machine over USB 3.0, I went looking for small USB 3.0-capable devices to go with it. There are a few interesting options. My laptop, which I carry around 90% of the time anyway, is the default choice. It is technically portable, but it's not really something you could use like a handheld camcorder. 

The smallest and least expensive device I found, thanks to a tip in last post's comments, is the ODROID-XU. At first I was skeptical that this small embedded Linux board could work with the camera, but there is actually a Point Grey app note describing how to set it up. The fixed 2GB of RAM would be limiting for buffering at full frame rate. And there is no SATA, since the single USB3.0 interface is intended for fast hard drives. So it would be limited to recording short bursts or at low frame rates, I think. But for the price it may still be interesting to explore. I will have to become a Linux hacker some day.

The Intel NUC, with a 4"x4" footprint, is another interesting choice if I want to turn it into a boxed camera, with up to 16GB of RAM and a spot for an SSD. The camera's drivers are known to work well on Intel chipsets, so this would be a good place to start. It would need a battery to go with it, but even so the resulting final package would be pretty compact and powerful. The only thing that's missing is an external monitor via HDMI out.

My first idea, and the one I ended up going with, is the Microsoft Surface Pro 2:

The Grasshopper3 take better pictures at 150fps than my phone does stills.
Other than a brief mention in a Point Grey app note, there wasn't any documentation that convinced me the Surface Pro 2 would work, but it has an Intel i5-4300 series, 8GB of RAM, and USB 3.0, so it seemed likely. And it did work, although at first not quite as well as my laptop (which is an i7-3740QM with 16GB of RAM). Using the FlyCapture2 Viewer, I could reliably record 120fps on the laptop, and sometimes if I kill all the background processes and the wind is blowing in the right direction, 150fps. On the Surface, those two numbers were more like 90fps and 120fps. Understandable, if the limitation really is processing power.

I also could not install the Point Grey USB 3.0 driver on the Surface. I tried every trick I know for getting third-party drivers to install in Windows: disabled driver signing (even though they are signed drivers), modified the .INF to trick Windows into accepting that it was in fact a USB 3.0 driver, turning off Secure Boot and UEFI mode, forcing the issue by uninstalling the old driver. No matter what, Windows 8.1 would not let me change drivers. I read on that internet thing that Windows 8 has its own integrated USB 3.0 driver, even though it still says Intel in driver name. Anyway, after a day of cursing at Windows 8 refusing to let me do a simple thing, I gave up on that approach and started looking at software.

The FlyCapture2 Viewer is a convenient GUI for streaming and saving images, but it definitely has some weird quirks. It tries to display images on screen at full frame rate, which is silly at 150fps. Most monitors can't keep up with that, and it's using processing power to convert the image to a GDI bitmap and draw graphics. The program also doesn't allow pure RAM buffering. It always tries to convert and save images to disk, filling the RAM buffer only if it is unable to do so fast enough. At 150fps, this leads to an interesting memory and processor usage waveform:

Discontinuous-mode RAM converter.
During the up slope of the memory usage plot, the program is creating a FIFO buffer in RAM and simultaneously pulling images out, converting them to their final still or video format, and writing them to disk. During the down slope, recording has stopped and the program finishes converting and saving the buffer. You can also see from the processor usage that even just streaming and displaying images without recording (when the RAM slope is zero) takes up a lot of processor time.

The difference between the up and down slopes is the reason why there needs to be a buffer. Hard disk speed can't keep up with the raw image data. An SSD like the one on the Surface Pro 2 has more of a chance, but it still can't record 1:1 at 150fps. It can, however, operate continuously at 30fps and possibly faster with some tweaking.

But to achieve actual maximum frame rate (USB 3.0 bus or sensor limited), I wanted to be able to 1) drop display rate down to 30fps and 2) only buffer into RAM, without trying to convert and save images at the same time. This is how high-speed cameras I've used in the past have worked. It means you get a limited record time based on available memory, but it's much easier on the processor. Converting and saving is deferred until after recording has finished. You could also record into a circular RAM buffer and use a post trigger after something exciting happens. Unfortunately, as far as I could tell, the stock FlyCapture2 Viewer program doesn't have these options.

The FlyCapture2 SDK, though, is extensive and has tons of example code. I dug around for a while and found the SimpleGUI example project was the easiest to work with. It's a Visual C# .NET project, a language I haven't used before but since I know C and VB.NET, it was easy enough to pick up. The project has only an image viewer and access to the standard camera control dialog, no capacity to buffer or save. So that part I have been adding myself. It's a work-in-progress still, so I won't post any source yet, but you can see the interface on this contraption:

Part of the motivation for choosing the Surface was so I could make the most absurd Mōvi monitor ever.
To the SimpleGUI I have just added a field for frame buffer size, a Record button, and a Save Buffer button. In the background, I have created an array of images that is dynamically allocated space in RAM as it gets filled up with raw images from the camera. I also modified the display code to only run at a fraction of the camera frame rate. (The code is well-written and places display and image capture on different threads, but I still think lowering the display rate helps.)

Once the buffered record is finished, Save Buffer starts the processor-intensive work of converting the image to its final format (including doing color processing and compression). It writes the images to a folder and clears out the RAM buffer as it goes. With the Surface's SSD, the write process is relatively quick. Not quite 150fps quick, but not far off either. So you record for 10-20 seconds, then save for a bit longer than that. Of course, you can still record continuously at lower frame rates using the normal FlyCapture2 Viewer. But this allows even the Surface to hit maximum frame rate.

All hail USB 3.0.
I just have to worry about cracking the screen now.
There are still a number of things I want to add to the program. I tested the circular buffer with post-trigger idea but couldn't get it working quite the way I wanted yet. I think that is achievable, though, and would make capturing unpredictable events much easier. I also want to attempt to write my own simultaneous buffering and converting/saving code to see if it can be any faster than the stock Viewer. I doubt it will but it's worth a try. Maybe saving raw images without trying to convert formats or do color processing is possible at faster rates. And there are some user interface functions to improve on. But in general I'm happy with the performance of the modified SimpleGUI program.

And I'm happy with the Grasshopper3 + Surface Pro 2 combo in general. They work quite nicely together, since the Surface combines the functions of monitor and recorder into one relatively compact device. The real enabler here is USB 3.0, though. It's hard to even imagine the transfer speeds at work. At 350MB/s, at any given point in time there are 10 bits, more than an entire pixel, contained in the two feet of USB 3.0 cable going from the camera to the Surface.

The sheer amount of data being generated is mind-boggling. For maximum frame rate, the RAM buffer must save raw images, which are 8 bits per pixel at 1920x1200 resolution. Each pixel has a color defined by the Bayer mask. (Higher bit depths and more advanced image processing modes are available at lower frame rates.) On the Surface, this means about 18 seconds of 150fps buffering, at most.

There are a variety of options available for color processing the raw image, and after color processing it can be saved as a standard 24-bit bitmap, meaning 8 bits of red, green, and blue for each pixel. In this format, each frame is a 6.6MB file. This fills up the 256GB SSD after just four minutes of video... So a better option might be to save the frames as high-quality JPEGs, which seems to offer about a 10:1 compression. Still, getting frame data off the Surface and onto my laptop for editing seemed like it would be a challenge.

Enter the RAGE.
USB 3.0 comes to the rescue here as well, though. There exist many extremely fast USB 3.0 thumb drives now. This 64GB one has a write speed of 50MB/s and a read speed nearing 200MB/s (almost as fast as the camera streams data). And it's not even nearly the fastest one available. The read speed is so fast that it's actually way better for me to just edit off of this drive than transfer anything to my laptop's hard drive.

Solid- I mean, Lightworks.
Lightworks seems to handle .bmp or .jpg frame folders nicely, importing continuously-numbered image sequences without a hassle. If they're on a fast enough disk, previewing them is no problem either. So I can just leave the source folders on the thumb drive - a really nice workflow, actually. When the editing is all done, I can archive the entire drive and/or just wipe it and start again.

While I was grabbing the USB 3.0 thumb drive, I also found this awesome thing:


It's a ReTrak USB 3.0 cable, which is absolutely awesome for Mōvi use - even better than the relatively flexible $5 eBay cable I bought to replace the suspension bridge cable that Point Grey sells. It's extremely thin and flexible, so as to impart minimum force onto the gimbal's stabilized payload. I'm not sure the shielding is sufficient for some of the things I plan to do with it, though, so I'll keep the other cables around just in case...

That's it for now. Here's some water and watermelon:


Tuesday, April 22, 2014

New Camera...thing.

After being completely surrounded by new cameras for a weekend at NAB 2014, I decided to do a little shopping around to possibly update my video camera. My Panasonic HDC-SD60 has served me well, especially with its 20x optical zoom and image stabilization. Pretty much every video on my site for the last few years has been from that camera. (This one is maybe my favorite, and shows its pretty decent low-light performance as well.) But there is so much new video camera technology now that I couldn't resist the urge to do some research into video cameras in the $1-2k price range.

Last year the Blackmagic Pocket Cinema Camera (BMPCC) was annouced at NAB and at the time I thought I might be interested in getting one. It's a really awesome camera because of its size and ability to shoot raw, wide dynamic range HD video, at a reasonable price. My only worry was that is was small enough that I might try to fly it on a smaller-than-adequate multirotor and crash. There's also the Panasonic GH3 (and new 4K GH4 coming soon), which is well-known for its extremely good video quality. It has the same interchangeable lens format (MFT) as the BMPCC.

But I also really like the camcorder format - specifically, a built-in zoom lens and optical stabilization. The BMPCC and GH3/GH4 (and other dSLRs that are out of my price range) have the advantage of large-format sensors that can collect lots of light, something that most camcorders with integrated zoom lenses suck at. But I did find an exception: the Sony HDR-CX900/B (2K) and FDR-AX100/B (4K), both with awesome 1" sensors. Sample footage from the FDR-AX100/B is especially impressive.

So with those as my top choices I considered the pros and cons decided on...

...none of the above.
And here's why: Everything I ever take video of is moving, and moving quickly. Not only that, but the camera usually is moving quickly to keep up. And every single one of those cameras has a rolling shutter, which is something that in my mind I can't understand how the world has come to accept (kind of like Hulu ads that are longer than TV commercial breaks). Looking at the end of this FDR-AX100 test video, it goes from "wow that is the sharpest-looking cat video I have ever seen on the internet" to "okay this is actually broken," in my view. So my solution to the problem was to run away from the consumer market entirely and get a machine vision camera with a global shutter. Specifically, a Point Grey Grasshopper 3 (GS3-U3-23S6C-C):

It's actually a tiny thing!
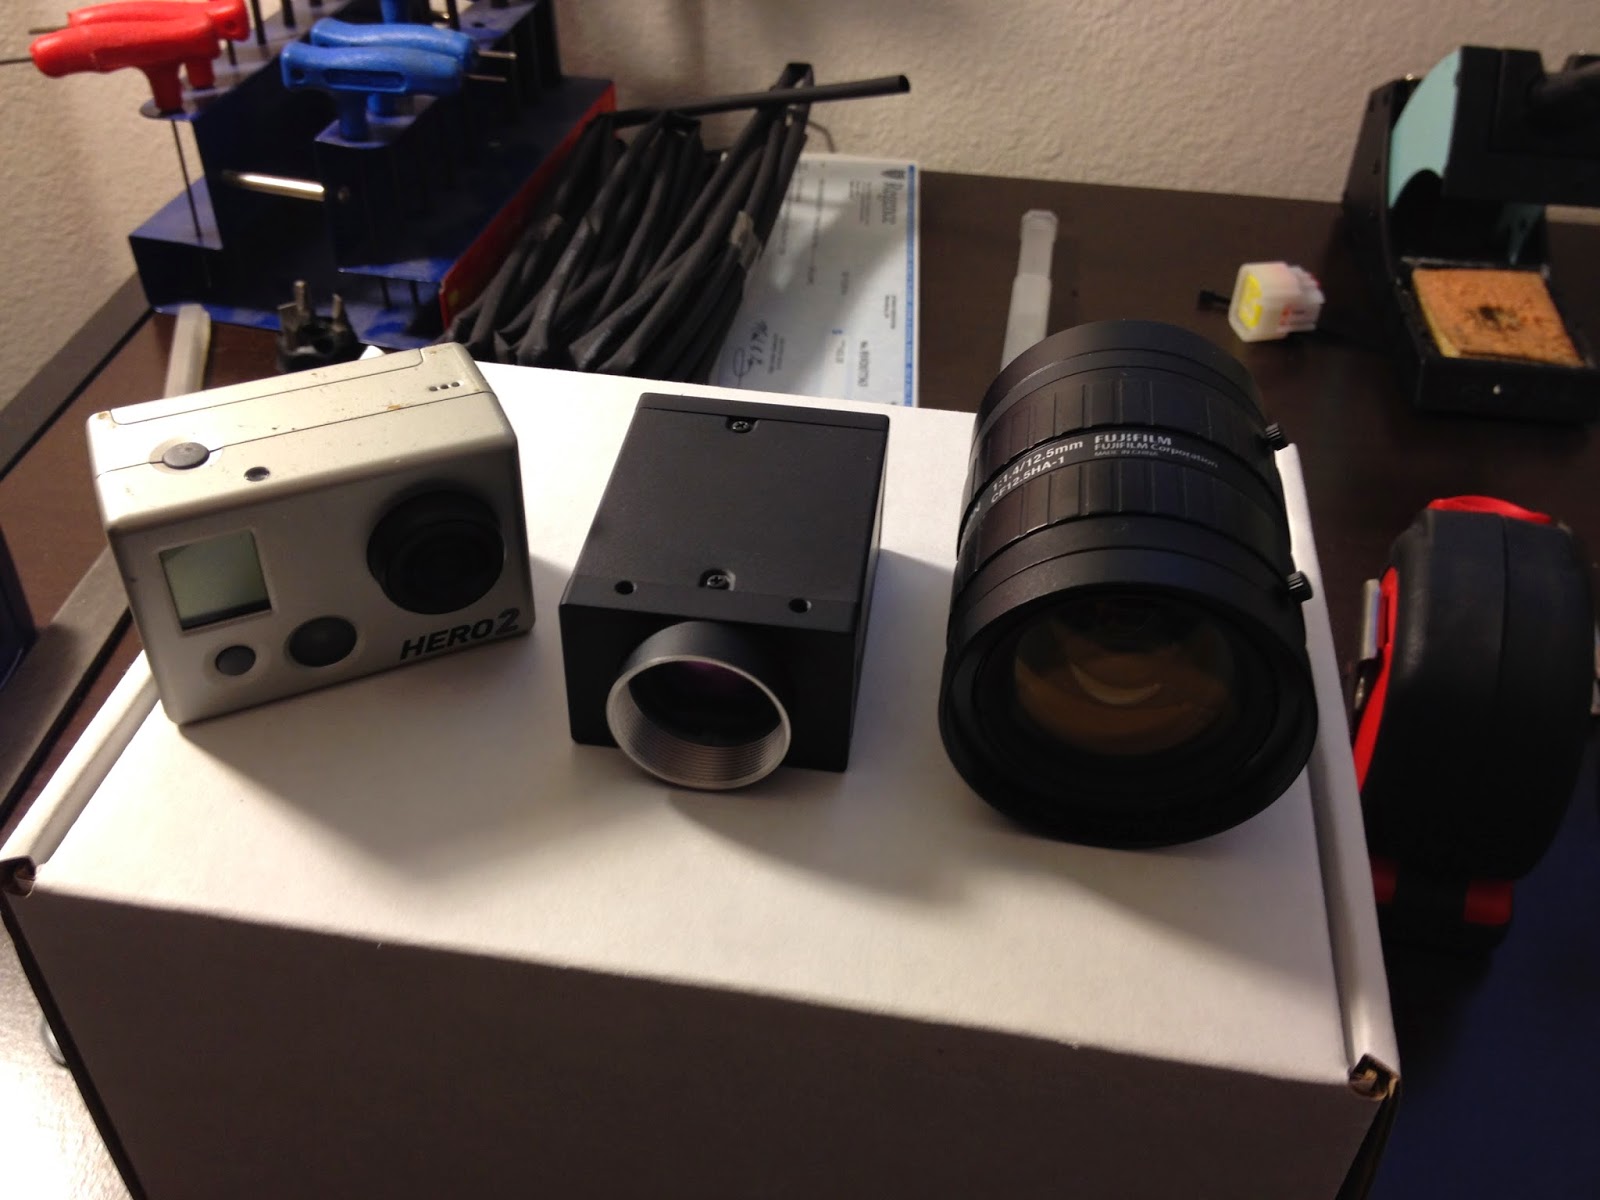
The body is smaller than a GoPro, but that's a pretty meaningless metric as I will explain shortly. As a machine vision camera, there are no shortage of inexpensive CCTV and scientific lenses for it. And this particular one has a color Sony IMX174 1/1.2" CMOS sensor, which is supposed to be quite good. Most machine vision cameras with global shutter use a CCD, but this new Sony global-shutter CMOS is interesting and hopefully will appear in a Sony camcorder soon, at which point maybe I rejoin the normal world. (Probably not; I am a terrible consumer because I usually think I could build things better from scratch...) But for now, the only way to get this sensor is in an industrial block camera like this.

No that's not a DB9 port...it's a USB3.0 mini-B.
Bill Kerman makes an excellent imaging test subject...
Anyway, the downside of a machine vision camera is that it's missing some (most?) parts a camera normally comprises. You've got a sensor, an FPGA for image processing, and a USB3.0 port. The rest is left as an exercise to the user. In effect, you are tied to a computer for recording the video. It's worth mentioning that the idea of an external recorder is not uncommon in high-end video cameras, so this isn't that unusual. But I did sort-of go in the opposite direction as the highly-integrated camcorder that I wanted. For now, anyway.

The benefits make up for it, I think. For starters, it can shoot up to 162 frames per second at 1920 x 1200 resolution. This is in 8-bit raw mode, so the data rate is 1920 x 1200 x 162 Bytes/s = 373MB/s. (For speed calculation, I'm treating 1MB as 1,000,000 Bytes, not 1,048,576 Bytes.) Color processing of the raw Bayer filter sensor data can be done on either side of the USB3.0 transfer, but for maximum frame rate it is left to the host computer. As for what happens to the data: if it can be written to hard drive space fast enough, it is. If not, as is the case on my laptop, it can be buffered in RAM.

Hrm, time to get an SSD I guess...
The RAM buffer is pretty common in high-speed cameras, but it means your record time is limited. The rate at which raw video chews through RAM is impressive. A fast SSD might just be able to keep up with the USB3.0 data rate, if there are no other bottlenecks in the system. For now, though, I just stuck to short bursts at the not-quite-maximum frame rate of 120fps:


I was playing with different video modes: mostly raw grayscale images and color-processed H.264 compression. (The H.264 encoding seems to be faster than the HDD write speed at the moment.) But yeah, it's certainly capable of high-quality HD video at 4-5x slow motion. At lower resolutions, it can go to even higher frame rates, mostly limited by the USB3.0 data rate.

Did you notice the global shutter? Freeze any of the frames with a propeller in it and the prop is visible in its normal shape...not something ranging from a banana to a boomerang depending on the shutter speed. The shutter can also be set as low as 5μs, meaning you can stop just about anything short of a bullet with enough light. (Ping-pong balls are relatively easy to stop even at ~2ms shutter speed and normal warehouse lighting, as was demonstrated.) 

The shutter can be synchronized with an external digital signal. So I can do this, but without a strobe gun. (Side note: You can see the rolling shutter wreaking havoc on the strobe in that video, and this one too, creating bands of light and dark as part of the image is shuttered with the strobe on and part of it with the strobe off.) The shutter sync works both ways too; it can also output a digital signal that is synchronized to the shutter. I have plans for this feature as well...

One other interesting characteristic of this sensor is that it has quite good low-light performance. This is useful for high-speed video since it can make the most out of the photons it gets with a very fast shutter. But it's also interesting to play with on its own. For example, I can image Bill Kerman in almost pitch black:


It's not nearly as impressive as the Sony A7s low-light demo, but it does produce quite nice video even at night, using the on-board color processor to do some gamma correction. Here's some video taken with just the slightest hint of light left in the sky:


I have no ideas what kind of ISO it can achieve, and it's not a published specification for this camera. (If I had to take a ballpark guess I would say ISO 2000+ with acceptable noise levels? I have almost no feel for that metric, though, so I'll have to try metering it against something.) But it's good compared to any video camera I've owned. Probably not quite as good as a full-frame dSLR. But combined with the global shutter, I think it can do some very interesting night shooting.

So far so good...I have many planned uses for this thing. The next step, though, will be un-tethering it...

Sunday, April 13, 2014

NAB Show 2014

This year was my second trip to the National Association of Broadcasters exhibition (NAB Show) in Vegas as part of the Freefly Systems setup and pit crew. NAB is a huge (~93,000 attendees) expo for media technology, kind of like CES but for the Producers rather than the Consumers. In fact it's in the same venue as CES, the Las Vegas Convention Center.


Last year, the MōVI gimbal debuted and I think I explained the concept of active stabilization (one I can't seem to escape no matter where I end up) to a thousand different people in four days. This year, I didn't even have time to count the number of other handheld active stabilizers there were at the show. Certainly the gimbal trend has taken hold and there is no going back now.

The Birdy Cam!
I think the MōVI brand still holds the top end of the active stabilizer market (highest performance and, yes, highest price). I haven't used and won't ever use this blog for advertising - I'm not good at it anyway - but one big advantage Freefly had was a one-year head start during which some really spectacular footage was created by ever-more-skillful operators, and it's fun to see the results.

One of the event highlights was this interview with Tabb (Freefly president) and Garret Brown, inventor of the Steadicam. I felt like there should be some lighting bolts for dramatic effect given the "Steadicam-killer" hype surrounding handheld gimbals. But in actuality, the point made is an important technical one: active stabilizers control {pitch, roll, yaw}. There are still three degrees of freedom {x, y, z} that are at the mercy of the operator's movement, and Steadicam and its operators have perfected the smoothing of translation over the last 40 years.

Part of the fun of NAB is that I finally get to show off what I've been working on. My big project for this NAB was the EE/software for the new MōVI Controller, possibly the most hardcore-looking RC transmitter in existence:

My pet project, the blue OLED display. (The one on the unit itself, not the SmallHD monitor...) Anti-aliased font support, bitmaps, bar graphs, scrolling, string and numeric formatting, etc., all in a lightweight display driver written from scratch.
The station I somehow ended up manning at NAB: the new controller paired with the largest MōVI, the M15, and the Sony F55, rigged with wireless video and remote focus.
People trying out the new controller. Controlling framing and focus at the same time would take some practice, I think, and there is still the option of having a third operator control focus.
This was a hands-on demo; anyone could walk up and try it out. On one hand this was great, because it means I don't have to hold it the entire time (it was about 18-19lbs, total). But on the other hand, as my Maker Faire experience has informed me, it also means constantly watching the equipment, making sure it stays operational, changing batteries, and reminding people to share...all while trying to answer questions. And of course while most people are very respectful of the hardware, there are the expo trolls who go from booth to booth trying to break things.

In general, booth ops went much more smoothly this year, I think, due to a combination of better preparation and more manpower. There were a few other new toys to keep people engaged as well:

A Zero FX electric motorcycle with a Steadicam arm and M15 gimbal attached to the back. It seems I can't escape electric motorcycles no matter where I end up, either.
The Tero, a 1/5th-scale camera car, made a return as well. It's carrying an inverted M10 gimbal and Blackmagic 4K Production Camera.
Because our hardware was working well, and because we had enough people in the pits to handle the traffic, I actually got to wander around the show floor this year. There was a lot of camera porn, for sure. The Sony a7S was one of the big announcements, a small camera with supposedly epic low-light performance thanks to a full-frame 35mm sensor with just enough huge, gapless pixels for 4K video. On the other end of the size spektrum, AJA and Blackmagic also announced new, relatively inexpensive, 4K professional cameras.

The Blackmagic URSA. I can't get over how nice the machining is. On the other side is a 10" 1080p monitor.
I also went in search of the large active stabilizers - the ones that are mounted to full-size helicopters and camera cars for just about every aerial or car chase scene in a movie ever. There were three that I found at the show this year:

Filmotechnic, camera car specialists, with the Russian Arm and Flight Head active stabilizer (not sure exactly which one).
Shotover K1 full-size helicopter gimbal. This was about twice as large as I thought it was.
Cineflex, about the size I thought it was, but attached to a 27'-wingspan RC plane! Ryan Archer gogogogogo.
Cineflex ATV with one mounted in front and another in back.
A few other random sights of the show:

Crab drive (Or is it Swerve Drive? I can never remember the distinction.) FIRST robot camera dolly.
The circular equivalent of energy chain.
EditShare Lightworks, a powerful and relatively inexpensive video editing tool that I discovered at last year's NAB and have been using since.
Cutaway of a Canon lens...not sure how this even exists.
So yeah, these were just some of the things I saw at the show this year. It's definitely a bit of a circus, with a lot of money spent on impressive booths (and yes, sadly, in this day and age, booth babes are still a thing).

Booth cars I can understand.
Ignoring the flashy bullshit is hard, but underneath there is some cool tech on display and that's mostly what I like to see. Active stabilizers, wireless HD video, less and less expensive high-quality video cameras, more accessible software, etc., all make for an exciting media era - one for which I will happily hide on the engineering side.