Showing posts with label GS3. Show all posts

Thursday, January 21, 2016

GS3 / Surfacecam GPU-Accelerated Preview

I've been further evolving the FlyCapture-based capture software for my Grasshopper3 camera system. This step involved merging in some work I had done to create a GPU-accelerated RAW file viewer. The viewer opens RAW files of the type saved out by the capture software and processes them through debayer, color correction, and convolution (sharpen/blur) pixel shaders. It was my first GPU-accelerated coding experience and I gained an appreciation for just how fast the GPU could do image processing tasks that take many milliseconds if done in software.

Some of the early modifications I made to the FlyCapture demo program were to reduce the frequency of the GDI-based UI thread, limit the size of the preview image, and force the preview to use only the easiest debayer algorithm (nearest-neighbor). This cut down the CPU utilization enough that the capture thread could buffer to RAM at full frame rate without getting bogged down by the UI thread. This was especially important on the Microsoft Surface Pro 2, my actual capture device, which has fewer cores to work with.

Adding the GPU debayer and color correction into the capture software lets me undo a lot of those restrictions. The GPU can run a nice debayer algorithm (this is the one I like a lot), do full color correction and sharpening, and render the preview to an arbitrarily large viewport. The CPU is no longer needed to do software debayer or GDI bitmap drawing. Its only responsibility is shuttling raw data to the GPU in the form of a texture. More on that later. This is the new, optimized architecture:


Camera capture and saving to the RAM buffer is unaffected. RAM buffer writing to disk is also unaffected. (Images are still written in RAW format, straight from the RAM buffer. GPU processing is for preview only.) I did simplify things a lot by eliminating all other modes of operation and making the RAM buffer truly circular, with one thread for filling it and one for emptying it. It's nice when you can delete 75% of your code and have the remaining bits still work just as well.

The UI thread has the new DirectX-based GPU interface. Its primary job now is to shuttle raw image data from the camera to the GPU. The mechanism for doing this is via a bound texture - a piece of memory representing a 2D image that both the CPU and the GPU have access to (not at the same time). This would normally be projected onto a 3D object but in this case it just gets rendered to a full-screen rectangle. The fastest way to get the data into a texture is to marshal it in with raw pointers, something C# allows you to do only within the context of the "unsafe" keyword...I wonder if they're trying to tell you something.


The textures usually directly represent a bitmap. So, most of the texture formats allow for three-color pixel formats such as R32G32B32A32 (32 bits of floating point each for Red, Green, Blue, and Alpha). Since the data from the camera represents raw Bayer-masked pixels, I have had to abuse the pixel formats a little. For 8-bit data, it's not too bad. I am using R8_UNorm format, which just takes an unsigned 8-bit value and normalizes it to the range 0.0f to 1.0f. 

12-bit is significantly more complicated, since there are no 12- or 24-bit pixel formats into which one or two pixels can be stuffed cleanly. Instead, I'm using R32G32B32_UInt and Texture.Load() instead of Texture.Sample(). This allows direct bitwise unpacking of the 96-bit pixel data, which actually contains eight adjacent 12-bit pixels. And I do mean bitwise...the data goes through two layers of rearrangement on its way into the texture, each with its own quirks and endianness, so there's no clean way to sort it out without bitwise operations.

This might be something like what's actually going on.
In order to accommodate both 8-bit and 12-bit data, I added an unpacking step that is just another pixel shader that converts the raw data into a common 16-bit single-color format before it goes into the debayer, color correction, and convolution shader passes just like in the RAW file viewer. The shader file is linked below for anyone who's interested.

The end result of all this is I get a cheaply-rendered high-quality preview in the capture program, up to full screen, which looks great on the Surface 2:


Once the image is in the GPU, there's almost no end to the amount of fast processing that can be done with it. Shown in the video above is a feature I developed for the RAW viewer, saturation detection. Any pixel that is clipped in red, green, or blue value because of overexposure or over-correction gets its saturated color(s) inverted. In real time, this is useful for setting up the exposure. Edge detection for focus assist can also be done fairly easily with the convolution shader. The thread timing diagnostics show just how fast the UI thread is now. Adding a bit more to the shaders will be no problem, I think.

For now, here is the shader file that does 8-bit and 12-bit unpacking (12-bit is only valid for this camera...other cameras may have different bit-ordering!), as well as the debayer, color correction, and convolution shaders.

Shaders: debayercolor_preview.fx

Saturday, November 7, 2015

DRSSTC Δt5: MIDI Streaming and Shutter Syncing

Until last week, I hadn't really touched my Tesla coil setup since I moved out to Seattle. Maybe because the next step was a whole bunch of software writing. As of Δt3, I had written a little test program that could send some basic frequency (resonant and pulse generation) and pulse shaping commands to the driver. But it was just for a fixed frequency of pulse generation and of course I really wanted to make a multi-track MIDI driver for it.

The number I had in mind was three tracks, to match the output capabilities of MIDI Scooter. While the concept was cool, the parsing/streaming implementation was flawed and the range of notes that you can play with a motor is kinda limited by the power electronics and motor RPM. So I reworked the parser and completely scrapped and rebuilt the streaming component of it. (More on that later.) Plus I did a lot of preliminary thinking on how best to play three notes using discrete pulses. As it turns out, the way that works best in most scenarios is also the easiest to code, since it uses the inherent interrupt prioritization and preemption capabilities that most microcontrollers have.


So despite my hesitation to start on the new software, it actually turned out to be a pretty simple coding task. It did require a lot of communication protocol code on both the coil driver and the GUI, to support sending commands and streaming MIDI events at the same time. But it went pretty smoothly. I don't think I've written as many lines of code before and had them mostly work on the first try. And the result is a MIDI parser/streamer that I can finally be proud of. Here it is undergoing my MIDI torture test, a song known only as "Track 1" from the SNES game Top Gear.


The note density is so high that it makes a really good test song for MIDI streaming. I only wish I had more even more tracks...


The workflow from .mid file to coil driver is actually pretty similar to MIDI scooter. First, I load and parse the MIDI, grouping events by track/channel. Then, I pick the three track/channel combinations I want to make up the notes for the coil. These get restructured into an array with absolute timestamps (still in MIDI ticks). The array is streamed wirelessly, 64 bytes at a time, to a circular buffer on the coil driver. The coil driver reports back what event index is currently playing, so the streamer can wait if the buffer is full.


On the coil driver itself, there are five timers. In order of interrupt priority:

  • The pulse timer, which controls the actual gate drive, runs in the 120-170kHz range and just cycles through a pre-calculated array of duty cycles for pulse shaping. It's always running, but it only sets duty cycles when a pulse is active. 
  • Then, there are three note timers that run at lower priority. Their rollover frequencies are the three MIDI note frequencies. When they roll over, they configure and start a new pulse and then wait for the pulse to end (including ringdown time). They're all equal priority interrupts, so they can't preempt each other. This ensures no overlap of pulses.
  • Lastly, there's the MIDI timer, which runs at the MIDI tick frequency and has the lowest interrupt priority. It checks for new MIDI events and updates the note timers accordingly. I'm actually using SysTick for this (sorry, SysTick) since I ran out of normal timers.
There are three levels of volume control involved as well. Relative channel volume is set by configuring the pulse length (how many resonant periods each pulse lasts). But since the driver was designed to be hard-switched, I'm also using duty cycle control for individual note volume. And there is a master volume that scales all the duty cycles equally. All of this is controlled through the GUI, which can send commands simultaneously while streaming notes, as shown in the video.


It's really nice to have such a high level of control over the pulse generation. For example, I also added a test mode that produces a single long pulse with gradually ramped duty cycle. This allows for making longer, quieter sparks with low power...good for testing.

I also got to set up an experiment that I've wanted to do ever since I got my Grasshopper 3 camera. The idea is to use the global shutter and external trigger capabilities of the industrial camera to image a Tesla coil arc at a precise time. Taking it one step further, I also have my favorite Tektronix 2445 analog oscilloscope and a current transformer. I thought that it would be really cool to have the scope trace of primary current and the arc in the same image at the same time, and then to sweep the trigger point along the duration of the pulse to see how they both evolve.


The setup for this was a lot of fun.

Camera is in the foreground, taped to a tripod because I lost my damn tripod adapter.
Using a picture frame glass as a reflective surface with a black background (and a neon bunny!).
I knew I wanted to keep the scope relatively far from the arc itself, but still wanted the image of the scope trace to appear near the spark and be in focus. So, I set up a reflective surface at a 45º angle and placed the scope about the same distance to the left as the arc is behind the mirror, so they could both be in focus. When imaged straight on, they appear side by side, but the scope trace is horizontally flipped, which is why the pulse progresses from right to left.


This picture is a longer exposure, so you can see the entire pulse on the scope. To make it sweep out the pulse and show the arc condition, I set the exposure to 20-50μs and had the trigger point sweep from the very start of the pulse to the end on successful pulses. So, each frame is actually a different pulse (should be clear from the arcs being differently-shaped) but the progression still shows the life cycle of the spark, including the ring-up period before the arc even forms.The pulse timer fires the trigger at the right point in the pulse through a GPIO on the microcontroller. Luckily, the trigger input on the camera is already optocoupled, so it didn't seem to have any issues with EMI.

Seeing the pulse shape and how it relates to arc length is really interesting. It might be useful for tuning to be able to see primary current waveform and arc images as different things are adjusted. No matter what, the effect is cool and I like that it can only really be done with old-school analog methods and mirrors (no smoke, yet).

Tuesday, September 22, 2015

GS3 / SurfaceCam Multipurpose Adapter

It's been a while since I've made anything purely mechanical, so I had a bit of fun this weekend putting together a multipurpose adapter for my Grasshopper 3 camera.


The primary function of the adapter is to attach the camera to a Microsoft Surface Pro tablet, which acts as the monitor and recorder via USB 3.0. I was going to make a simple adapter but got caught up in linkage design and figured out a way to make it pivot 180º to fold flat in either direction.


Some waterjet-cut parts and a few hours of assembly later, and it's ready to go. The camera cage has 1/4-20 mounts on top and bottom for mounting to a tripod, or attaching accessories, like an audio recorder in this case. There's even a MōVI adapter for attaching just the Sufrace Pro 2 to an M5 handlebar for stabilizer use. (The camera head itself goes on the gimbal inside a different cage, if I can ever find a suitable USB 3.0 cable.)

Anyway, quick build, quick post. Here are some more recent videos I've done with the GS3 and my custom capture and color processing software.


Plane spotting at SeaTac using the multipurpose adapter and a 75mm lens (250mm equivalent).

Slow motion weed trimming while testing out an ALTA prototype. No drones were harmed in the making of this video.


Freefly BBQ aftermath. My custom color processing software was still a bit of a WIP at this point.

Sunday, September 7, 2014

Grasshopper3: Circular Buffer, Post Triggering, and Continuous Modes

Previously I have implemented a bare-bones RAM buffering program for the Grasshopper3 USB3 camera. The idea was to strip out all operations other than transferring raw image data from the USB3 port to RAM, so that the full frame rate of the camera can be buffered even on a Microsoft Surface2 tablet. While the RAM buffer is filling, no image conversion or saving to disk operations are going on. The GUI is running on another thread, and the image preview rate is held to 30Hz.

One-shot linear buffer with pre-trigger: 1) After triggering, frames are transferred into RAM (yellow). 2) RAM buffer is full. 3) Images are converted and saved to disk (not in real-time).
At the time I also tried to implement a circular buffer, where the oldest images are continuously overwritten in RAM. This allows for post-triggering, a common feature of high-speed cameras. The motivation for post-triggering is that the buffer is short (order of seconds) but you don't know when the exciting thing is going to happen. So you capture image data at full frame rate, continuously overwriting the oldest images in the buffer, until something exciting happens. The trigger can come after the action, stopping the image data capture and locking the previous N image frames in the buffer. The entire buffer can then be saved starting from the oldest image and ending at the trigger.

Circular buffer with post-trigger: 1) Buffer begins filling with frames. 2) After full, the oldest frame is overwritten with the newest. 3) A post-trigger stops buffering new frames and starts saving the previous N frames to disk.
It didn't work the first time I tried it; the frame rate would drop after the first time through the buffer. But I did a little code cleanup - now the first time through it constructs the array elements that make up the frame buffer, but on subsequent passes it assumes the structures are already in place and just transfers in data. This makes a wonderful flat-top trapezoidal wave of RAM usage that corresponds exactly with the allocated buffer size:


Post-triggering is not the only thing a circular buffer structure is good for. It can also be used as the basis for robust (buffered) continuous saving to disk. Assuming a fast enough write speed, frames can be continuously taken out of the buffer on a First-In First-Out (FIFO) basis and written to disk. I say "disk" but in order to get fast enough write speeds it really does need to be a solid-state drive. And even then it is a challenge.

For one, the sequential write speed of even the fastest SSDs struggles to keep up with USB3. To achieve maximum frame rate, the saved images must be in a raw format, both to keep the size down (one color per pixel, not de-Bayered) and to avoid having the processor bottleneck the entire process during image conversion. Luckily there is an option to just spit out raw Bayer data in 8- or 12-bit-per-pixel formats. IrfanView (my favorite image viewer) has a plug-in that is capable of parsing and color-processing raw images. The plug-in also works with the batch conversion portion of IrfanView, so you can convert an entire folder of raw frames.

The other challenge is that the operations required to save to disk take up processor time. In the FlyCap2 software that comes with the camera, the image capture loop has no trouble running at full frame rate, but turning on the saving operation causes the frame processing rate to drop on my laptop and especially on the MS Surface 2. To try to combat this problem, I did something I've never done before: actually intentionally write a multi-threaded application the right way. The image capture loop runs on one thread while the save loop runs on a separate thread. (And the GUI runs on an entirely different thread...) This way, a slow-down on the saving thread ideally doesn't cause a frame rate drop on the capture thread. The FIFO might fill up a little, but it can catch up later.

Continuous saving: Images are put into the RAM buffer on one thread (yellow) and removed from it to write to disk on another thread (green). This happens simultaneously and continuously as long as the disk write can keep up.
There's another interesting twist to the continuous-saving circular buffer: the frame rate in doesn't necessarily have to equal the frame rate out. For example, it's possible to buffer into RAM at 150fps but save only every 5th frame, for 30fps output. Then, if something exciting happens, the outgoing rate can be switched to 150fps temporarily to capture the high-speed action. If the write-to-disk thread can't keep up, the FIFO grows in size. As long as the outgoing rate is switched back to 30fps before the buffer is full, the excess FIFO elements can be unloaded later.

The key parameter for this continuous saving mode is the number of frames of delay between the incoming and the outgoing thread. The target delay could be zero, but then you would have to know in advance if you want to switch to high-speed saving. Setting the target delay to some number part-way through the buffer allows for post-triggering of the high-speed saving period, which seems more useful. I added a buffer graphic to the GUI to show both the target and the actual saving delay during continuous saving. My mind still has trouble thinking about when to turn the frame rate divider on and off, but I think it could be useful in some cases.

Here's some video I took to try out these new modes. It's all captured on the Microsoft Surface 2, so no fancy hardware required and it's all still very portable.


This is a simple test of the circular buffer at 1080p150 with post-trigger. The coin in particular is a good example of when it's nice to just leave the buffer running and post-trigger after a lucky spin gets the coin to land in frame.


More coin spinning, but this time using the continuous saving mode. Frames go into RAM at 150fps, but normally they are only written to disk at 30fps. When something interesting happens (such as the coin actually being in frame...), a burst of 150fps writing to disk is triggered. On the Surface 2, the write thread is slower than the read thread, so it can only proceed for a little while until the FIFO gets too full. Switching back to 30fps saving allows the FIFO to catch up.


Finally. a quick test of lower resolution / higher frame rate operation. At 480p, the frame rate can get up to 360+ fps. Buffering is fine at this frame rate (the overall data rate is actually lower). It actually doesn't require an insane amount of light either - the iPhone display is the only source of light here. You can see its IR proximity sensor LED flashing, as well as individual frame transitions on the display, behind the water stream. The maximum frame rate goes all the way up to 1100+ fps at 120p, sometime I have yet to try out.

That's it for now. The program (which started out as the FlyCapture2SimpleGUI source that comes with the camera) has a nice VC# GUI:


I can't distribute the source since it's derived from the proprietary SDK, but now you know it's possible and relatively easy to get it to capture and save efficiently with a bit of good programming. It was a fun project since I've never intentionally written interacting multi-threaded programs, other than maybe separating GUI threads from other things. I guess I'm only ten years or so behind on my application programming skills now...

Monday, May 5, 2014

Grasshopper3 Mobile Setup

I've now got a complete mobile setup working for the 
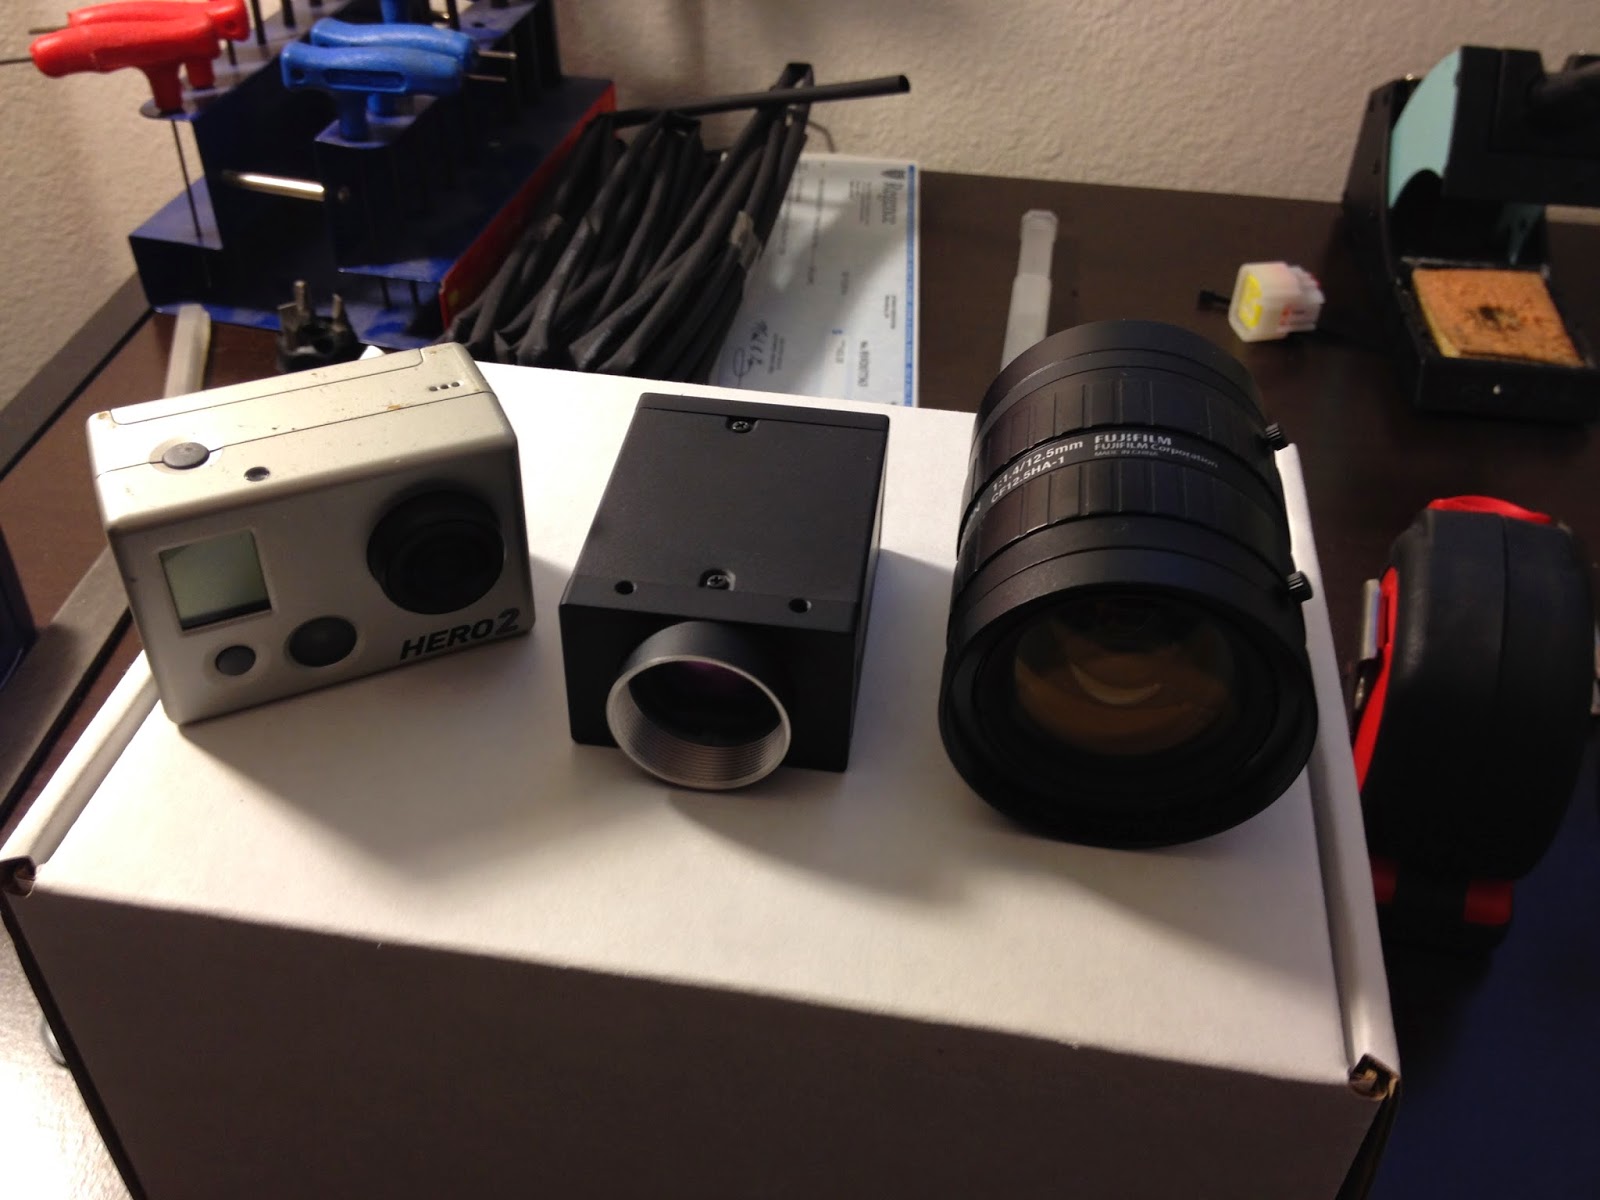
Grasshopper3 camera that I started playing with last week, and I took it for a spin during the Freefly company barbecue. (It's Seattle, so barbecues are indoor events. And it's Freefly, so there are RC drift cars everywhere.)


Since the camera communicates to a Windows or Linux machine over USB 3.0, I went looking for small USB 3.0-capable devices to go with it. There are a few interesting options. My laptop, which I carry around 90% of the time anyway, is the default choice. It is technically portable, but it's not really something you could use like a handheld camcorder. 

The smallest and least expensive device I found, thanks to a tip in last post's comments, is the ODROID-XU. At first I was skeptical that this small embedded Linux board could work with the camera, but there is actually a Point Grey app note describing how to set it up. The fixed 2GB of RAM would be limiting for buffering at full frame rate. And there is no SATA, since the single USB3.0 interface is intended for fast hard drives. So it would be limited to recording short bursts or at low frame rates, I think. But for the price it may still be interesting to explore. I will have to become a Linux hacker some day.

The Intel NUC, with a 4"x4" footprint, is another interesting choice if I want to turn it into a boxed camera, with up to 16GB of RAM and a spot for an SSD. The camera's drivers are known to work well on Intel chipsets, so this would be a good place to start. It would need a battery to go with it, but even so the resulting final package would be pretty compact and powerful. The only thing that's missing is an external monitor via HDMI out.

My first idea, and the one I ended up going with, is the Microsoft Surface Pro 2:

The Grasshopper3 take better pictures at 150fps than my phone does stills.
Other than a brief mention in a Point Grey app note, there wasn't any documentation that convinced me the Surface Pro 2 would work, but it has an Intel i5-4300 series, 8GB of RAM, and USB 3.0, so it seemed likely. And it did work, although at first not quite as well as my laptop (which is an i7-3740QM with 16GB of RAM). Using the FlyCapture2 Viewer, I could reliably record 120fps on the laptop, and sometimes if I kill all the background processes and the wind is blowing in the right direction, 150fps. On the Surface, those two numbers were more like 90fps and 120fps. Understandable, if the limitation really is processing power.

I also could not install the Point Grey USB 3.0 driver on the Surface. I tried every trick I know for getting third-party drivers to install in Windows: disabled driver signing (even though they are signed drivers), modified the .INF to trick Windows into accepting that it was in fact a USB 3.0 driver, turning off Secure Boot and UEFI mode, forcing the issue by uninstalling the old driver. No matter what, Windows 8.1 would not let me change drivers. I read on that internet thing that Windows 8 has its own integrated USB 3.0 driver, even though it still says Intel in driver name. Anyway, after a day of cursing at Windows 8 refusing to let me do a simple thing, I gave up on that approach and started looking at software.

The FlyCapture2 Viewer is a convenient GUI for streaming and saving images, but it definitely has some weird quirks. It tries to display images on screen at full frame rate, which is silly at 150fps. Most monitors can't keep up with that, and it's using processing power to convert the image to a GDI bitmap and draw graphics. The program also doesn't allow pure RAM buffering. It always tries to convert and save images to disk, filling the RAM buffer only if it is unable to do so fast enough. At 150fps, this leads to an interesting memory and processor usage waveform:

Discontinuous-mode RAM converter.
During the up slope of the memory usage plot, the program is creating a FIFO buffer in RAM and simultaneously pulling images out, converting them to their final still or video format, and writing them to disk. During the down slope, recording has stopped and the program finishes converting and saving the buffer. You can also see from the processor usage that even just streaming and displaying images without recording (when the RAM slope is zero) takes up a lot of processor time.

The difference between the up and down slopes is the reason why there needs to be a buffer. Hard disk speed can't keep up with the raw image data. An SSD like the one on the Surface Pro 2 has more of a chance, but it still can't record 1:1 at 150fps. It can, however, operate continuously at 30fps and possibly faster with some tweaking.

But to achieve actual maximum frame rate (USB 3.0 bus or sensor limited), I wanted to be able to 1) drop display rate down to 30fps and 2) only buffer into RAM, without trying to convert and save images at the same time. This is how high-speed cameras I've used in the past have worked. It means you get a limited record time based on available memory, but it's much easier on the processor. Converting and saving is deferred until after recording has finished. You could also record into a circular RAM buffer and use a post trigger after something exciting happens. Unfortunately, as far as I could tell, the stock FlyCapture2 Viewer program doesn't have these options.

The FlyCapture2 SDK, though, is extensive and has tons of example code. I dug around for a while and found the SimpleGUI example project was the easiest to work with. It's a Visual C# .NET project, a language I haven't used before but since I know C and VB.NET, it was easy enough to pick up. The project has only an image viewer and access to the standard camera control dialog, no capacity to buffer or save. So that part I have been adding myself. It's a work-in-progress still, so I won't post any source yet, but you can see the interface on this contraption:

Part of the motivation for choosing the Surface was so I could make the most absurd Mōvi monitor ever.
To the SimpleGUI I have just added a field for frame buffer size, a Record button, and a Save Buffer button. In the background, I have created an array of images that is dynamically allocated space in RAM as it gets filled up with raw images from the camera. I also modified the display code to only run at a fraction of the camera frame rate. (The code is well-written and places display and image capture on different threads, but I still think lowering the display rate helps.)

Once the buffered record is finished, Save Buffer starts the processor-intensive work of converting the image to its final format (including doing color processing and compression). It writes the images to a folder and clears out the RAM buffer as it goes. With the Surface's SSD, the write process is relatively quick. Not quite 150fps quick, but not far off either. So you record for 10-20 seconds, then save for a bit longer than that. Of course, you can still record continuously at lower frame rates using the normal FlyCapture2 Viewer. But this allows even the Surface to hit maximum frame rate.

All hail USB 3.0.
I just have to worry about cracking the screen now.
There are still a number of things I want to add to the program. I tested the circular buffer with post-trigger idea but couldn't get it working quite the way I wanted yet. I think that is achievable, though, and would make capturing unpredictable events much easier. I also want to attempt to write my own simultaneous buffering and converting/saving code to see if it can be any faster than the stock Viewer. I doubt it will but it's worth a try. Maybe saving raw images without trying to convert formats or do color processing is possible at faster rates. And there are some user interface functions to improve on. But in general I'm happy with the performance of the modified SimpleGUI program.

And I'm happy with the Grasshopper3 + Surface Pro 2 combo in general. They work quite nicely together, since the Surface combines the functions of monitor and recorder into one relatively compact device. The real enabler here is USB 3.0, though. It's hard to even imagine the transfer speeds at work. At 350MB/s, at any given point in time there are 10 bits, more than an entire pixel, contained in the two feet of USB 3.0 cable going from the camera to the Surface.

The sheer amount of data being generated is mind-boggling. For maximum frame rate, the RAM buffer must save raw images, which are 8 bits per pixel at 1920x1200 resolution. Each pixel has a color defined by the Bayer mask. (Higher bit depths and more advanced image processing modes are available at lower frame rates.) On the Surface, this means about 18 seconds of 150fps buffering, at most.

There are a variety of options available for color processing the raw image, and after color processing it can be saved as a standard 24-bit bitmap, meaning 8 bits of red, green, and blue for each pixel. In this format, each frame is a 6.6MB file. This fills up the 256GB SSD after just four minutes of video... So a better option might be to save the frames as high-quality JPEGs, which seems to offer about a 10:1 compression. Still, getting frame data off the Surface and onto my laptop for editing seemed like it would be a challenge.

Enter the RAGE.
USB 3.0 comes to the rescue here as well, though. There exist many extremely fast USB 3.0 thumb drives now. This 64GB one has a write speed of 50MB/s and a read speed nearing 200MB/s (almost as fast as the camera streams data). And it's not even nearly the fastest one available. The read speed is so fast that it's actually way better for me to just edit off of this drive than transfer anything to my laptop's hard drive.

Solid- I mean, Lightworks.
Lightworks seems to handle .bmp or .jpg frame folders nicely, importing continuously-numbered image sequences without a hassle. If they're on a fast enough disk, previewing them is no problem either. So I can just leave the source folders on the thumb drive - a really nice workflow, actually. When the editing is all done, I can archive the entire drive and/or just wipe it and start again.

While I was grabbing the USB 3.0 thumb drive, I also found this awesome thing:


It's a ReTrak USB 3.0 cable, which is absolutely awesome for Mōvi use - even better than the relatively flexible $5 eBay cable I bought to replace the suspension bridge cable that Point Grey sells. It's extremely thin and flexible, so as to impart minimum force onto the gimbal's stabilized payload. I'm not sure the shielding is sufficient for some of the things I plan to do with it, though, so I'll keep the other cables around just in case...

That's it for now. Here's some water and watermelon:


Tuesday, April 22, 2014

New Camera...thing.

After being completely surrounded by new cameras for a weekend at NAB 2014, I decided to do a little shopping around to possibly update my video camera. My Panasonic HDC-SD60 has served me well, especially with its 20x optical zoom and image stabilization. Pretty much every video on my site for the last few years has been from that camera. (This one is maybe my favorite, and shows its pretty decent low-light performance as well.) But there is so much new video camera technology now that I couldn't resist the urge to do some research into video cameras in the $1-2k price range.

Last year the Blackmagic Pocket Cinema Camera (BMPCC) was annouced at NAB and at the time I thought I might be interested in getting one. It's a really awesome camera because of its size and ability to shoot raw, wide dynamic range HD video, at a reasonable price. My only worry was that is was small enough that I might try to fly it on a smaller-than-adequate multirotor and crash. There's also the Panasonic GH3 (and new 4K GH4 coming soon), which is well-known for its extremely good video quality. It has the same interchangeable lens format (MFT) as the BMPCC.

But I also really like the camcorder format - specifically, a built-in zoom lens and optical stabilization. The BMPCC and GH3/GH4 (and other dSLRs that are out of my price range) have the advantage of large-format sensors that can collect lots of light, something that most camcorders with integrated zoom lenses suck at. But I did find an exception: the Sony HDR-CX900/B (2K) and FDR-AX100/B (4K), both with awesome 1" sensors. Sample footage from the FDR-AX100/B is especially impressive.

So with those as my top choices I considered the pros and cons decided on...

...none of the above.
And here's why: Everything I ever take video of is moving, and moving quickly. Not only that, but the camera usually is moving quickly to keep up. And every single one of those cameras has a rolling shutter, which is something that in my mind I can't understand how the world has come to accept (kind of like Hulu ads that are longer than TV commercial breaks). Looking at the end of this FDR-AX100 test video, it goes from "wow that is the sharpest-looking cat video I have ever seen on the internet" to "okay this is actually broken," in my view. So my solution to the problem was to run away from the consumer market entirely and get a machine vision camera with a global shutter. Specifically, a Point Grey Grasshopper 3 (GS3-U3-23S6C-C):

It's actually a tiny thing!
The body is smaller than a GoPro, but that's a pretty meaningless metric as I will explain shortly. As a machine vision camera, there are no shortage of inexpensive CCTV and scientific lenses for it. And this particular one has a color Sony IMX174 1/1.2" CMOS sensor, which is supposed to be quite good. Most machine vision cameras with global shutter use a CCD, but this new Sony global-shutter CMOS is interesting and hopefully will appear in a Sony camcorder soon, at which point maybe I rejoin the normal world. (Probably not; I am a terrible consumer because I usually think I could build things better from scratch...) But for now, the only way to get this sensor is in an industrial block camera like this.

No that's not a DB9 port...it's a USB3.0 mini-B.
Bill Kerman makes an excellent imaging test subject...
Anyway, the downside of a machine vision camera is that it's missing some (most?) parts a camera normally comprises. You've got a sensor, an FPGA for image processing, and a USB3.0 port. The rest is left as an exercise to the user. In effect, you are tied to a computer for recording the video. It's worth mentioning that the idea of an external recorder is not uncommon in high-end video cameras, so this isn't that unusual. But I did sort-of go in the opposite direction as the highly-integrated camcorder that I wanted. For now, anyway.

The benefits make up for it, I think. For starters, it can shoot up to 162 frames per second at 1920 x 1200 resolution. This is in 8-bit raw mode, so the data rate is 1920 x 1200 x 162 Bytes/s = 373MB/s. (For speed calculation, I'm treating 1MB as 1,000,000 Bytes, not 1,048,576 Bytes.) Color processing of the raw Bayer filter sensor data can be done on either side of the USB3.0 transfer, but for maximum frame rate it is left to the host computer. As for what happens to the data: if it can be written to hard drive space fast enough, it is. If not, as is the case on my laptop, it can be buffered in RAM.

Hrm, time to get an SSD I guess...
The RAM buffer is pretty common in high-speed cameras, but it means your record time is limited. The rate at which raw video chews through RAM is impressive. A fast SSD might just be able to keep up with the USB3.0 data rate, if there are no other bottlenecks in the system. For now, though, I just stuck to short bursts at the not-quite-maximum frame rate of 120fps:


I was playing with different video modes: mostly raw grayscale images and color-processed H.264 compression. (The H.264 encoding seems to be faster than the HDD write speed at the moment.) But yeah, it's certainly capable of high-quality HD video at 4-5x slow motion. At lower resolutions, it can go to even higher frame rates, mostly limited by the USB3.0 data rate.

Did you notice the global shutter? Freeze any of the frames with a propeller in it and the prop is visible in its normal shape...not something ranging from a banana to a boomerang depending on the shutter speed. The shutter can also be set as low as 5μs, meaning you can stop just about anything short of a bullet with enough light. (Ping-pong balls are relatively easy to stop even at ~2ms shutter speed and normal warehouse lighting, as was demonstrated.) 

The shutter can be synchronized with an external digital signal. So I can do this, but without a strobe gun. (Side note: You can see the rolling shutter wreaking havoc on the strobe in that video, and this one too, creating bands of light and dark as part of the image is shuttered with the strobe on and part of it with the strobe off.) The shutter sync works both ways too; it can also output a digital signal that is synchronized to the shutter. I have plans for this feature as well...

One other interesting characteristic of this sensor is that it has quite good low-light performance. This is useful for high-speed video since it can make the most out of the photons it gets with a very fast shutter. But it's also interesting to play with on its own. For example, I can image Bill Kerman in almost pitch black:


It's not nearly as impressive as the Sony A7s low-light demo, but it does produce quite nice video even at night, using the on-board color processor to do some gamma correction. Here's some video taken with just the slightest hint of light left in the sky:


I have no ideas what kind of ISO it can achieve, and it's not a published specification for this camera. (If I had to take a ballpark guess I would say ISO 2000+ with acceptable noise levels? I have almost no feel for that metric, though, so I'll have to try metering it against something.) But it's good compared to any video camera I've owned. Probably not quite as good as a full-frame dSLR. But combined with the global shutter, I think it can do some very interesting night shooting.

So far so good...I have many planned uses for this thing. The next step, though, will be un-tethering it...