Saturday, May 28, 2011

IRL Flinch

What was I working on?

Oh, right, it's summer, the most productive build season by far. No more excuses: Quals are done, I didn't fail out of MIT, and it's time to get back on track with the current list of open and pending projects:
  1. Flinch, a miniature Mecanum-drive robot, the subject of this post.
  2. Adapting the 3ph v3.1 controller for sensorless field-oriented control. Mostly a software project.
  3. A new brushless controller with a lot more power and several new tricks I've been meaning to try. The first iteration is almost ready for circuit boards. Look for a post on this shortly. Hint: It's called DirectDrive.
  4. The newest vehicle from the Edgerton Center Summer Engineering Workshop (of DIY SegwayCap Kart, and BWD Scooter fame). This one is very cool. Hint: We're back to four wheels.
But first, Flinch. Here's a reminder of where this one is going:


Like Twitch, Flinch is an omni-directional, or "holonomic", robot. It doesn't have Twitch's fancy linkage steering, though. Instead it uses Mecanum wheels to accomplish 4I3O omni-directional control. I suspect it will take a good amount of software help to make the tiny Mecanum wheels effective at the kinds of speeds I hope to achieve with Flinch (~10fps), but for now I'm focusing on getting the mechanics and temporary electrical system in place.


The first order of business was to produce the motor mounts. I made all four at once from a piece of 1" wide aluminum stock, cutting them down to size later:

Under normal circumstances, 16 blind-tapped 4-40 mounting holes would be an annoyance, but compared to Quals, it was a relative pleasure.

Next, I made an insta-chassis with top, bottom, and side plates:


The top and bottom plates are laser-cut UHMW from Big Blue Saw. (I guess in this case it's more like Big Infrared Saw since it was probably cut with a CO2 laser...) I've never worked with UHMW before, but it seems to be a nice, cheap alternative for robots that don't quite justify an aluminum plate chassis. To make up for the bendiness of the plastic top and bottom, I ditched the standoffs in the original CAD model for solid 1/4" side plates.


I did put the standoffs to good use, though: From the side plates, a standoff sticks into a bearing I added to the outside of each Mecanum wheel, acting as a dead axle. It provides a bit of extra support to the wheel, even though the structural loop around the chassis is not as stiff as it would be with aluminum top and bottom plates. After dropping it a few times (on purpose), I found that the bearings would just pop out, so I added some washers to hold them in place:


I'm missing some M3 screws required to mount the motors, which is preventing final assembly for now, but here's what it looks like all together:

There's something wrong with this picture. If you can spot it, you win a cookie.
After I get the motors mounted, I may borrow the electronics package from mini4WDbot to do some initial testing. I don't expect very good open-loop performance, especially at high speeds, but you never know. I might be pleasantly surprised by the handling. And even if not, it's a good way to make sure all the motors work and the wheels do roughly what Mecanum wheels are supposed to do.

Tuesday, May 24, 2011

Mini-Segstick, My Mid-Quals Crisis Robot

MechE Quals, Round 2.

I just finished up the subject tests for Round 2, Do or Die Edition. One thing I hate about Quals (besides the peer pressure to consume yourself in study for six months and the shell-shocked look on everyone's faces after they come out of the oral exams) is the artificial mysteriousness around it all. Which, by the way, is propagated by both the faculty and the prior test takers. So even though I failed the first time and my outcome this time is faaaar from certain, I have been in observer mode this entire time and I'll continue to post my (obviously opinionated/experiential) impression of exactly how it all works.

Here's the summary of where I stand after Day 2:

Machine Design: Definite pass. Once again, the least amount of studying for the most result. Gears, linkages, mechanisms, motors, transmission ratio, power budget. Where have I seen these things before? It's the subject with which I have the most hands-on experience, and no doubt that makes a big difference. If you want to learn something...do it.

Manufacturing: Definite fail. Okay, so I don't know anything about heat transfer into a mold. That was one part out of nine, and I failed because of it. That alone doesn't bother me as much as the nature of this test. Normally, the written and the oral are separate problems. Here, the oral exam was literally a critique of your weakest answers on the written exam. And by critique I mean drill down on the same numerical analysis that I clearly do not understand, for fifteen minutes, and leave five minutes for the other eight parts that I actually was able to do. If the point is to make me feel like an idiot, well, mission accomplished.

Controls: Oh, Controls. How can I sum up my experience with the MechE Controls Qual? Both times I've taken the written Controls exam now, I've gotten totally lost in the algebra required to model the system. If you can't get past that in one hour, there is absolutely no hope of getting to show your knowledge of control of the system. Then there's the Controls oral exam. Whereas the other oral exams have two, three, or maybe four professors sitting in on them, Controls for some reason seems to need six or seven. This time around, even though there were only three of us taking the test, we got seven profs again. And make no mistake, they will attempt to tear you apart at your weakest point.

I learned a couple of very important lessons from the Controls oral last time that served me well this time:
  1. Do not waste time on the algebra. On the orals, they tend to give you the answer to the system modeling part. Just use it and do the rest of the problem, then go back to the math if you have time. Last time I spent 20 minutes working out the math during the reading period only to be told within the first 2 minutes of the exam that "we don't have time to do algebra." Okay, fine. This time I explained how to do the math, but that's it.
  2. Use your notes. This was probably the most important lesson I learned. Last time I walked in, put my notes down, and proceeded to try to re-do everything on the board, while be bombarded with questions. This time, notes in hand, I at least managed to show them what I had already worked through.
So the second time around I was able to at least hold my ground in the Controls orals. But I don't know if it will be enough to make up for the algebra train-wreck that was the written exam...


Actually...none of that really bothers me though. No, what really bothers me is that they put a motherfucking self-balancing robot on the written exam.


I have this thing about self-balancing things. Mainly, nobody really "gets" how these things work, and how to implement a controller for things like these things. And I can't tell you how many times I've explained why it's harder to make a self-balancing robot thing than a full-sized self-balancing...thing

If you're going to stand on it, all the controller has to do is try to keep the platform horizontal. It doesn't have to worry about wheel speed or position control, since you do that. The robot has to do it all. And it's got a faster time constant, because it's smaller. And while we're at it, let's throw in full mass and inertia on both the stick and the wheel as well so we get a nice coupled matrix that I can spend 60 minutes trying to untie. Had I managed to do so, the answer to Part 1 of 5, would have looked  something like this:


If you have absolutely nothing better to do, here's the full derivation, including the defintions of the H's. So let's just say I had been drilling algebraic manipulation since kindergarten and I could get to that point in less than 60 minutes. It turns out to have the typical inverted pendulum form with a set of real poles, one of which is in the right half-plane. Stabilizing it is straightforward with a PD controller.

Then the problem went on to talk about damping at the wheel/stick interface, which according to MATLAB adds a zero at the origin and a pole in the left half-plane. (Am I supposed to just know that, or what?) The zero at the origin is problematic because it "traps" the unstable pole in the right half-plane. So you can use PID control to cancel that zero and drag everything back over into the left half-plane. I feel like this was the interesting part of the problem, and I never got to it because I had to first untie the mass matrix into a transfer function. Working through the solution took me about eight hours, spread over two days. So if this is designed to be a one hour test, I never even had a chance.

But you know what else I can do in eight hours?

Build it.
I figured, since I already have the nice compact sensor/controller/motor drive combo-board from Segstick, I should strap it to a robot. Yes, those are mecanum wheels. No, they don't serve a purpose. It's just the quickest motor and wheel set I had available. They're really for Flinch. I've seen enough of self-balancing things to know that, if you do it right, they can tolerate almost any disturbance you can find, including oddly-shaped wheels.

Even if MechE decides I am not good enough at mass matrices and root loci to merit a Quals Pass, I refuse to accept the implication that I can't build a working self-balancing robot in my sleep. I have been messing around with the balancing framework for almost four years now. For example, one thing entirely not captured by the controls problem is the fact that you don't actually get a measurement of angle. You get, at best, noisy accelerometer data and drift-y gyro data. Dealing with this has somehow become an odd specialty of mine.

Then there is the thing I always rant about, which is that controlling a self-balancing robot thing is inherently harder than controlling a ridable balancing thing. While the balance controller can be a simple PD loop that keeps the platform horizontal, you have no way of controlling the speed of the robot. Inertial sensors are inertial, i.e. they don't know the difference between standing still and moving at 10fps straight at a wall. The human rider can close a loop with his or her mind that keeps the platform stationary, or moving at a constant speed, but a robot needs help. This extra feedback can come in the form of a radio control, wheel speed sensors, or in the case of Mini-Segstick, a hack speed estimator that just low-pass filters the motor command.


By the way, don't try to do laundry during Quals week.

Mini-Segstick uses a strange control strategy that I don't think you can find on a root locus. I thought of it a long time ago for making an RC balancing robot, but I've never actually implemented it until now. It runs the normal balance controller all the time, trying to stay vertical, but if it senses that it's been moving forward for too long, it will make the gains "softer" for leaning backwards than for leaning forwards. That is, it will resist less to disturbances that cause it to lean backwards and slow down. And vice versa if it's been going backwards for too long. It definitely behaves differently than the normal 2nd-order balancing thing does. You can see it make movements that are seemingly preventative...moving in the "wrong" direction now to prevent a big problem later. It's...fascinating. Maybe after Quals is done altogether I'll build a permanent one and really tweak the controls.

So while I wait for the results of Round 2, I'm content with the fact that even if I can't finish a Controls problem in a reasonable amount of time, I can still build a real control system. At least I haven't gotten (much) stupider since I became a grad student. I look forward greatly to being useful again after Thursday.

Sunday, May 15, 2011

eBay Hack Charger #7,523

I really should start a project page for random power supplies that I put together with junk from eBay...

A few weeks ago, I re-purposed an Xbox 360 power supply for my battery charger, and commented on how nice it would be to have a flat OEM power supply brick like this one from TDK Lambda instead. Well, I didn't find that on eBay, but I may have found the next best thing. Vicor is another manufacturer of shiny OEM power converter bricks, and I happened to come across a lot of these:


Turns out Azure Dynamics, a local EV technology company, has an eBay store, presumably for stuff they don't need anymore. I'll be sure to check back regularly. The VI-251-09 brick takes 100-300Vdc and puts out 12V at 200W. I also managed to find a matching Vicor input rectifier module, though presumably any bridge rectifier could work. Combined, the rectifier and DC/DC converter are functionally equivalent to the XBox 360 power supply, but a lot smaller. Some assembly is required, though:


The input is 120Vac and the output is trimmed up to 13.2Vdc. In between, I added a two-pack of 200V, 330μF capacitors. This buffers the rectified AC at the input to the DC/DC converter. The disk-looking capacitors between the terminals and the baseplate are recommended in the datasheet for EMI protection, i.e. they are probably not necessary.


And as usual, I found a random heat sink in MITERS that was already the perfect size for fitting the input rectifier and DC/DC converter brick. I added the fans after experimentally determining that they were needed to hit the full 200W output. Through some sort of luck, the 8-32's I happened to have lying around self-tap into the heat sink fins. Since I'm not an HVfrosh, I thought it wise to insulate all the high voltage pins and ground the heat sink in the final configuration.


I also randomly found a box/carrying case that everything fits in perfectly. There's even a little square left for the balancing lead breakout board. I really should stop measuring things and just look around until I find things that are exactly the right size. It works well.

Wednesday, May 11, 2011

Meet Flinch


Every year during and immediately after 2.007, I have a bit of robot nostalgia. Last year, this resulted in Twitch, Jr., a switched-mode omnidirectional robot named after Team 1565's '08 FIRST bot. Since then Twitch has had a professional HD camera mounted to it, driven a microphone stand around at the 2.007 final contest, been on something like three Japanese TV shows, and recently been to the Cambridge Mini Maker Faire. It's by far the most fun robot to drive, ever. And I've driven a lot of robots.

But now I think it's time for Twitch to have a friend:

d'awwwww
Flinch is a smaller robot, 9"x8"x2.125" and probably less than 3lbs. While Twitch uses a fairly rare linkage drive, Flinch will feature the somewhat more common Mecanum wheel solution for omnidirectional motion. Mecanum wheels have been around for a while, but were popularized by FIRST and AndyMark over the past seven years or so. You can see what exactly they do on Team 97's '08 FIRST bot. (2008 was a great year for drivetrains.)


The wheels give it the ability to defy typical 4WD robot kinematics by controllably moving sideways. Two axes of translation and one of rotation are simultaneously available, making it a true holonomic drive. (Twitch, in its most extreme configurations, only has two degrees of freedom.) What makes this possible are angled rollers on the Mecanum wheels:


Flinch will use four of these 2.125"-diameter Mecanum wheels from FingerTech. They each have six rollers angled at 45º from the drive axis. Effectively, a robot with four of these wheels, independently driven, can create force vectors at 45º angles from each wheel's contact point. By summing these vectors, the translation and rotation of the robot is determined. Or, if you know the (x,y,θ) you want, you can run them through a 4x3 matrix to recover the wheel commands. (I guess the extra degree of freedom is the burnout axis.)

Straightforward kinematics will only get you so far, though. The real difference between a mediocre Mecanum drive and a good Mecanum drive is closed-loop control. The addition of a gyro to control the rotational degree of freedom made a big difference in Twitch's driveability, and I suspect at least that much will also be required for Flinch. I left a standard mounting pattern for electronics so that I can start with an Arduino Nano Carrier (shut up) and upgrade later to a full custom solution with integrated inertial sensors, motor control, and maybe even a magnetometer for Earth-oriented control. More on that in a later post.

For now, I've mostly been focusing on the mechanical elements. For one, an obsessively detailed CAD model of the wheel. I don't think I've ever been so disoriented by reference geometry before.


And then there are the rollers. I know there is a parametric equation governing the profile of the rollers, and there seems to be some discussion as to whether it is parabolic or elliptical. I took the easy way out:

It is what it is.
Next, motors. Unfortunately, Banebots has entirely stopped making small gearboxes, apparently. Every single one is out of stock. They've also folded up the 36mm RS-380 line that Twitch utilized so well. So basically, they only sell P60 and P80's now? And even those take 10-15 business days to ship? Fuck you, BaneBots. (I'll probably still buy your shit since it's cheaper than any alternative.)

Also, I refuse to use FingerTech's 16mm gearmotor (the one for which this wheel was designed). It just looks so dinky. The FK-050 motor and the flimsy-looking shaft are not my style. Aren't there any companies still making good robot drive solutions!? Oh yes...Pololu Robotics, where I got the motor controllers for both Twitch and Segstick. They have their own line of gearmotors now, too. And they actually don't look dinky.

Metal.
Flinch will use the 9.7:1 HP model, probably running 7.4-11.1V like Twitch. This would give it a no-load speed of around 10fps, even accounting for the √2 from the Mecanum wheels, and significantly more than its own weight in available traction force. Of course, this all depends on having two things: (1) a fast and powerful ESC, which I suspect will have to be custom, and (2) very good closed-loop control to keep it stable at high speeds. If I can meet those two criteria, I think Flinch will be amazingly quick.

Flinch will also be a little more durable than Twitch. By necessity, Twitch has outboard wheels, but this puts them in a vulnerable location. They also have wimpy plastic spokes that tend to crack when Twitch hits a wall, or when other robots attack Twitch for no reason. Since the Mecnaum set is a rather large investment, Flinch will instead have enclosed wheels, and they will be doubly-supported:


The addition of a tiny 1/4"-ID, 1/2"-OD bearing is easy, since the wheel bore is already just under 1/2". And the outboard axle is the same 1" standoff used to space out the two chassis plates. Simple. Nevermind that the chassis itself, with wheel wells cut out, is probably not rigid enough to make the structural loop meaningful. At least the wheel will look like it's supported on both sides. It's probably slightly better than nothing.

The chassis plates will be waterjet-cut, so the only real fabrication required are the motor mounts and outboard axle mounts. So basically, I could have a laser-cut prototype done some time this week...

...because clearly Designing and Manufacturing a robot with interesting System Dynamics and Controls is the best way to study for quals.


Wednesday, April 27, 2011

eBay Hack Charger #...idk I lost count.

It's been a while since I thought about battery charging...

...which is probably a good thing.
This might be a good time to mention that you should not take anything I say about lithium battery chargers seriously...and if you do, you are doing so at your own risk. I highly recommend buying a name-brand off-the-shelf charger and using it according to the manufacturer's instructions.

Frankly, though, my habit of going on eBay, buying the most absurd power supply I can find, and making a battery charger out of it is mostly just unfounded EVT urban legend. But I do take pride in the Cell Abuser, pictured above, which is essentially a 4V/250A power supply I bought for $100. And yes, it is attached directly to an A123 26650 cell with copper blocks and a quick-clamp. It's as close to the 8.02 ideal voltage source as you can get. The result was about as unexciting as you can imagine: the cell charged from 0 to 80% SOC in 102 seconds and to 94% SOC in 3 minutes. At the end it was...warm.

That CV-only charger was just to prove a point, though. For actual day-to-day charging of the LiFePO4 packs I use a sophisticated BMS and integrated charging system re-purposed LED power supply. The MeanWell PLC-100 and the HLG-240 lines actually make very capable 100W and 240W (respectively) CC/CV battery chargers, as I've expounded on in the past. I've been using the HLG-240-36A as BWD and Pneu Scooter's dedicated fast-charger for a long time now.

But it doesn't do cell balancing and you have to buy one specific to your pack voltage and it doesn't make cool beeping noises when it's done and and and...

Okay shut up I finally bought one of these.
Yes, I agree, it's sometimes more useful to have a charger that can handle any pack voltage and can also balance the cells at the end of a charge. For Pneu Scooter, I use separate battery balancers every...well pretty much never; it just stays balanced because A123 cells are so good. But a balance charger would come in handy when first assembling and balancing a pack. So I finally caved and bought a 1010B charger while they were in stock.

But dammit, my MeanWell was $135 and this thing was $128 and doesn't even include a way to plug it into the wall. Too bad there aren't high-current 12V power supplies available for $7...

Oh wait, there totally are.
Thanks to Sasha for the tip. This stupid thing is an obsolete Xbox 360 power supply brick. And it literally is the size of a brick, if not a little bigger. Only Microsoft needs an entire support page dedicated to a wall adapter. Apparently, it's obsolete because it's the old 203W model (12V/16.5A), but since I'm looking for high current anyway it's perfect. They're available on eBay for basically the cost of shipping.

I bought a whole box of them for $60 with free shipping.
They seem pretty easy to work with. Inside the DC output cable there are about 8 more wires than there need to be. All the yellow wires seems to be 12V and all the black wires seem to be GND. Though, there is one set of thinner-gauge yellow and black that seems kinda shady. The red and blue wires can be shorted together to turn the output on. (I guess usually the Xbox takes care of this.) A few alligator clips later and...


It's still a little bulky. If I were truly going for ultra-compactness and I had an infinite amount of money to spend, I'd get a shiny 300W TDK Lambda supply or something similar. But for basically free, this is not bad. It's better than lugging around a giant closed-frame power supply. Now, does it work?


Seems to handle a 5A charge (into a 1.8Ah LiPo) just fine. I let it run until the alligator clips started to smell funny. 

And finally, to show how it compares to the 240W MeanWell:


The 1010B/Xbox Frankenstein charger has the clear advantage of being able to handle any pack size and it can do balance charging. But the MeanWell LED sign supply still wins on size, price, robustness, and power. Verdict: I'll stick with the MeanWell for dedicated vehicle charging, but the 1010B rig will be useful for small robot packs, which vary more in size and charge current rating.

Sunday, April 10, 2011

Sensorless

I hate making excuses almost as much as I hate Toscanini's, but my project progress and posting frequency has gone way down this semester as a result of having actual work to do just to keep up with 2.007, my class on power electrons, and, oh yeah, PhD qualifier exams, Round 2. (Shout-out to all you MechE controls profs: How about a Segway problem? Eh? You know you want to.)

Doooooooo it.
Anyway, whenever it is that I am able to get back to doing real things, I've set a new target on sensorless field-oriented control. The 
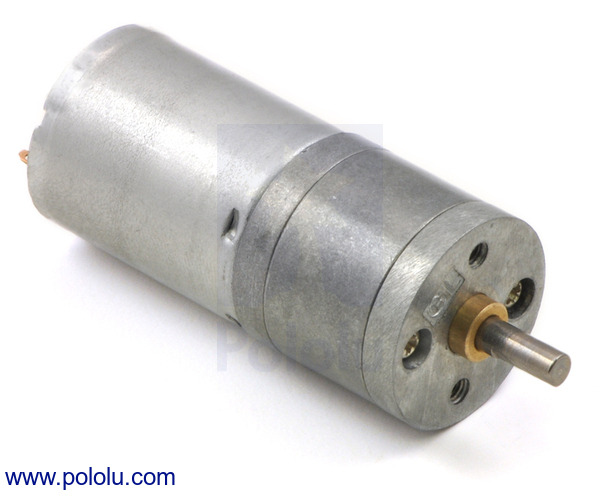
interpolated Hall effect sensor FOC I use now works great, even at low speed, the sensor costs $3 to implement, it's mostly reliable, and it's easy to fix. So of course it's my job now to make it twitchy and unreliable, especially at low speeds, and to eat the $3 cost savings by improving the current sensors.

And there are so many ways to do sensorless control of brushless motors...

Turnigy Sentilon 100A HV
One way is just to buy a sensorless controller. Besides being a cop out, sensorless controllers like the one  above are designed for voltage-controlled RC airplane duty. They use block commutation - driving two phases and measuring EMF on the third to determine rotor position. So, no field-oriented control, no sine waves, no current limting, and only crude start-up routines. Despite all that, a large enough RC plane ESC can sometimes be made to work well for small vehicles.

And sometimes  not.
What I'm more interested in is true field-oriented control without position sensors. This means sinusoidal commutation with a high-resolution rotor position estimate, and independent control of the torque-producing current (Iq) and field-augmenting current (Id). With this type of control, all three motor phases are being driven at all times, so there is no opportunity to directly measure back EMF. Thus, a different way of deriving rotor position is required. Here's where the field diverges (lolpun) into several approaches:
  • Rotor position estimators that measure asymmetric rotor inductance using test pulses or high frequency injection. These have the advantage of working even at zero speed.
  • Open-loop back EMF or flux observers, which require a good motor model.
  • Closed-loop back EMF or flux observers, which are more forgiving.

There are at least two ways to detect the rotor position of a permanent magnet motor even at a standstill. If the rotor has saliency, its inductance is a function of electrical angle. Internal permanent magnet (IPM) motors are one good example of this, since the flux path through rotor steel changes as a function of angle. But surface permanent magnet (SPM) motors, like the ones I mostly encounter, have more-or-less constant inductance. The magnets themselves have close to the permeability of air, and the steel back-iron is rotationally symmetric.

A good sensorless algorithm could probably pick up the little magnet-retaining nubs, though...
There's another way to statically determine the position of the rotor, which relies only on the fact that motors like this operate stator teeth very near to saturation. The flux density in the most "orange" teeth in the FEMM simulation above is about 1.8T. So, driving current into that tooth's winding would not be able to increase the flux as much in the positive direction as it would in the negative direction. (Also, the rise time would be faster in the positive direction.) A clever algorithm could pick out the rotor position based on this principle.

I don't really want to write a clever algorithm, though. Measuring inductance requires good high-bandwidth current sensing, which I don't currently have, to pick out the rise time in response to a voltage step. Also, this algorithm only applies to start-up unless you use high-frequency injection to measure inductance dynamically while the phases are being driven. I'm sure there are some magic ways to do this that are cleaner than I am imagining (Rainer Nase, I'm looking at you...), but right now it's not something I want to mess this.

Moving on, then, to open-loop observers.

An observer is a control structure that attempts to recreate states which are hidden from direct sensing. Generally, an observer requires some model of the plant, so a good place to start would be a model of a three-phase brushless motor.

Engineers do it with models.
It would be nice to know the back EMF, but it's buried inside the black-box PMSM somewhere. Instead, we need to use maths:


The first maths is just stating KVL for the motor model. V and I can be measured directly, and presumably we know R and L for a given motor, so solving for back EMF, E, shouldn't be a problem. If we know the back EMF, then we know the position of the rotor. 

The second maths is an alternative open-loop observer on rotor flux linkage, which is just the integral of back EMF. This has some practical advantage over the first maths. Taking the derivative of the already-noisy current measurement will result in bad things, so even though they are physically equivalent, the smoothing integral formulation of the flux observer is more appealing in a noisy environment. Since rotor flux lines up with the permanent magnets, this also gives rotor position.

The closed-loop observers go one step further.

The motor model is only valid if resistance and inductance are known. If the model parameters are off, the estimated states will also be off. A closed-loop observer attempts to correct for modeling error with feedback. Generally speaking, the closed-loop observer goes something like this:
  1. Input the drive voltage, V, based on the PWM state.
  2. Estimate the current, i*, based on the motor model and back EMF estimate.
  3. Compare to the measured current, i.
  4. Feedback (i - i*) into the observer to modify the back EMF estimate.
"Fake motor" exists only in software.
This is less dependent on having perfectly accurate resistance and inductance parameters. The linear version of this, called a Luenberger observer, is detailed in Mevey, Chapter 7. Since I learned pretty much everything I know about brushless motor theory from Mevey's thesis, I would give a lot of weight to his particular explanation. 

There is also a slightly different feedback structure that I really like, called a sliding-mode observer. Instead of using the value of (i - i*), it uses only the sign of the error in what is aptly described as a Class D Error Amplifier, switching rapidly between a positive and a negative feedback path. The appeal of this method, covered well in Microchip AN1078, is that the switching structure clearly "eats" the current measurement noise. Right? ...... Right?

Anyway the sliding mode observer structure from AN1078 is the one I am most interested in trying, since it might even work on my existing hardware, crappy current sensors and all. The only question remaining is exactly which current and back EMF are being observed. 

Down the rabbit hole of coordinate systems we go...

Motor theory people seem to really like changing coordinate frames. Both the Luenberger observer and the sliding mode observer are most often presented as seeking the stator-frame components of current and back EMF. That is, two orthogonal components (α,β) on a coordinate plane that is tied to the stator, as opposed to (d,q) which is tied to the rotor. In a balanced three-phase system, this is a minimum set of information required to capture the state of the motor. And it makes sense to use this frame for the observed quantities because...

...because...I don't know why. They all seem to get the (α,β) flux or back EMF vector, then go back to rotor angle using an arctan function. Putting an arctan in my fast loop sounds like a horrible idea, and, excess processing power aside, I would like to avoid it if at all possible. So:

Why not observe the back EMF or the rotor flux on each phase? It's easy to do, since there are no coordinate transformations involved. The fast loop can certainly handle the numeric integration and sliding-mode compensator on all three phases. (It would have to do two components plus a coordinate transform and an arctan anyway.) But then how do you get to the rotor angle? Here is where I start digging a brand new rabbit hole...

I can get the rotor angle the same way I do now. All I need are fake Hall effect sensors for my fake motor.

Since I am observing back EMF or flux on each phase, I can easily (with if statements) detect zero crossings and flag a fake Hall effect sensor transition. This can then feed my existing controller, including the sine wave interpolation, with no modification at all. The rotor angle is calculated by the existing interpolation routine with no need for arctan. It's unconventional, which I like, but I really think it will work and it's simpler than what's out there.

So far, I'm ignoring the problem of start-up, the noisy current sensors, and many other practical issues like the fact that I can't yet program my controller wirelessly and it's buried in my scooter... I'll need to solve some of these in the near future before I can really test this out. But it's on the horizon, and now that it's in writing, I have to do it...

Saturday, April 2, 2011

EVER '11


I'm back!

EVER (the international conference on Ecological Vehicles and Renewable Energies, except with the R and E reversed because it is French) is my favorite conference EVER. Last time, the Cap Kart crew and I went in 2009, confused a lot of professors, and ate crepes. This time, Charles and I went in 2011, confused a lot of professors, and ate crepes. Oh, and test-drove an electric box thing that (probably) ran on an Arduino:


...all the Nissan Leaves were spoken for, okay?

Actually, I kinda liked it because you could clearly feel all the inner workings of the electric drive. It reminded me of the Cap Kart...you had to press an LED-lit button with an arrow on it to choose forward or reverse, and it had the turning radius of a small truck. Not sure how well that bodes for commercialization, but it was fun in sport mode, anyway.

Actually, we were there to present a paper on Miniature Electric Hub Motors, which if you're new to this game, is the key technology in Pneu Scooter, BWD, and about one third of the crazy things Charles builds. Generally speaking, the miniature hub motors are more of a fun hobby for us, but we really couldn't pass up this opportunity to disrupt the atmosphere of an academic conference with them.

Yo, where can we park these?

Oh right, I forgot to mention that we brought hardware. As it turns out, both Pneu Scooter and RazEr rEVolution fit well into checked air baggage. (I took Pneu Scooter to and from Singapore as I was completing it.) The only tricky part is the lithium batteries, but according to the TSA, one large (up to 300Wh) battery installed in a device is allowed in checked baggage. Pneu Scooter's battery clocks in at 145Wh, so I should be fine, right? ... Right?

Overall, the presentation was well-received. The chair for our session was Professor Zhu, who is sort-of like a permanent magnet motor deity. In fact, at EVER '09, he delivered the keynote presentation on fractional-slot PM motors, which is exactly the type that we tend to use for the mini hub motors. Of course, then, one of our main goals was to get Prof. Zhu to test drive the scooters.

Mission accomplished.

The academic conference was fairly standard - a lot of math. The highlight, for me, was a dirt-simple explanation of sensorless control using a flux observer that is exactly what I've been looking for. Sensorless control may be silly for EVs, but I'm still willing to give it a try just to see if I can implement it on my hardware. My hunch is that I will have to improve my current sensors a bit. (3ph 4.0?)

The best thing about bringing vehicles, though, is that we got to crash some of the concurrent events, such as the two-wheel vehicle Ride and Drive...


...and the two-wheel vehicle Acceleration Test...


...which I'm not sure we were supposed to be allowed to do. Considering that the other entries all used pedal assist (and one had more than the nominal two wheels), and absolutely none of them fit in a suitcase, the mini hub motor scooters put up a good fight. I think most people were surprised; I don't know if that's because the scooters actually kept up with the e-bikes, or if it was because they had no idea where we came from or if we were even entered in the race.

Overall, another fun trip to the weird bubblestate of Monaco. I leave you with my proposal for how all suitcases should be constructed:

Fuck little plastic wheels.