Showing posts with label ksp. Show all posts

Saturday, October 5, 2019

KSP: Laythe Colony Part 4, Drop Ships and Lonely Rovers

After the second Jool launch window, I still had 196 days to get a few extra ships off Kerbin before its destruction on Year 3, Day 0. They couldn't transfer to Jool until the third launch window - around Year 3, Day 260 - but they could still get out of harm's way. I hadn't specified exactly how Kerbin is destroyed, but since this entire scenario is based on Seveneves, I think it was reasonable to say that these ships should not sit in cismunar orbit. So I decided to send them out to Minmus for parking.

Colony ship #11 or #12 - I lost count. Parked at Minmus for a front row seat to the end of the world.
By this point I was getting pretty tired of building colony ships. Each one takes about a dozen launches to assemble, crew, and fuel in low Kerbin orbit. But I managed to get two more built and parked at Minmus. I also realized that there would be a little bit of a housing shortage on Laythe with the extra 72 Kerbals these colony ships carry, so I sent up one more HAB1 transfer ship as well. But parking ships in Minmus orbit isn't exactly efficient, and I am running a pretty tight Δv budget. A perfect opportunity, then, to create one last piece of hardware for this mission.

The Drop Ships

The DS1 lander, a last-minute mining platform and fuel tanker for the fleet.
Until now, the only ships in my fleet with mining capabilities were the LR1 rovers, which can refuel space planes on the surface of Laythe. The planes can then climb into Laythe orbit and transfer any spare fuel to the colony ships. But it would take quite a few launches to fully refuel the colony ships this way. Better to mine on a moon with a shallow gravity well, like Pol, and net a bunch more fuel. So I designed a drop ship mining platform/tanker to do just that. Refueling the ships parked at Minmus before the third Jool transfer window would be a good test.

I've done space planes and straightforward powered descent, but never a true VTOL in the sense of a ship that is designed to hover and translate horizontally looking for flat ground or good mining prospects. Most of my knowledge about drop ships comes from watching Cupcake Landers videos. I just tried to make it symmetric, place the C.G. properly, and set up the fuel tanks so that the C.G. doesn't shift much as they drain.

Drop ship mining practice on Minmus.
Even though they're essentially flying fuel tanks, cruising through mountain ranges in the low gravity of Minmus in them is easy and actually kind-of fun. Normally I'm trying to time suicide burns just right or not stall out my space planes, both of which are more stressful technical tasks. Piloting a drop ship is closer to a sci-fi landing experience.  Which reminds me: if you're looking for a quick diversion from the brutally technical challenge of KSP, Outer Wilds is a beautiful (and creepy) exploration/mystery game with some incredible open-world storytelling. Absolutely worth going in blind and playing through.

Back to Minmus mining, though. I only had time to build two of these drop ships. They can operate autonomously, but they also have room for a pilot, for navigation in frontier areas with poor relay coverage, and an engineer, for more efficient mining. I realized while building these final few ships that I neglected to put relay antennas on the colony ships, something that is required for remote piloting rovers, space planes, or drop ships. Since I might need to do a lot of remote piloting in the Jool system, I decided to steal a couple relay satellites from Kerbin orbit.

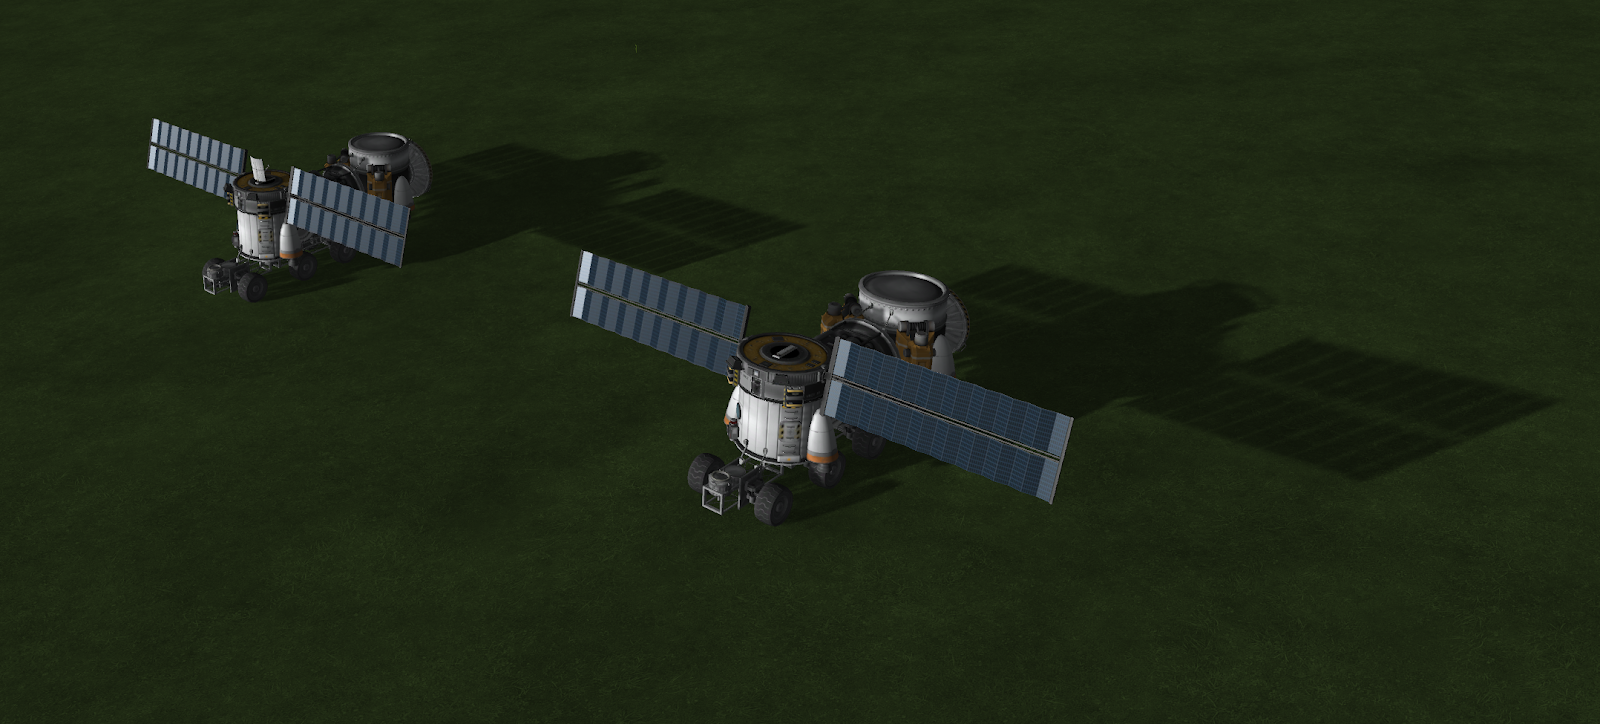
Stealing a satellite with the grabby claw I knew would come in handy.
Once these ships leave Kerbin orbit, there won't be any need for a Kerbin comms network anymore, so I (literally) grabbed some of Kerbin's relay satellites with the last two colony ships. It is possible to create a remote piloting connection through a relay satellite in a grabby claw, something I find satisfyingly appropriate for Kerbal-style mission "planning". Anyway, I made a few round trips to Minmus surface to refuel the ships of the third wave and then that was it for Kerbin.

0 Days Remain

On Year 3, Day 0, time was up for the Kerbal home planet. The remaining population (of 432 Kerbals) was in flight, either on the way to Jool or at Minmus awaiting the third transfer window. No more hardware would be launched and the roughly four kilotons of ship and propellant in the fleet would have to become the Laythe colony. But it would still be almost another two years before the first colony ship arrives in the Jool system. Before that, the robotic fleet would have to lay the groundwork.

The Lonely Rovers

The 18 ships of the first Jool launch window arrived at their destination during the second half of Year 3. I set up the transfers such that the relay satellites would arrive first, since having a working comms net in the Jool system would be crucial to the rest of the mission. The RS3 ships and especially the ion engine satellites themselves have plenty of Δv to spare, so I just brute-forced them into useful coverage orbits around Jool and Laythe.

The first relay satellites arrive at Jool. I'm definitely guilty of setting up the WiFi before unpacking...
For the remainder of the ships, though, the Δv budget was tight enough that I definitely wanted to grab Tylo gravity assists on the way in. This created a bit of traffic as several ships would hit the Tylo gateway within days, or sometimes hours, of each other. To get captured using a gravity assist, I aimed to pass "in front of" Tylo, so that its gravity mostly pulls in a direction opposite my orbit and I feed it some of my kinetic energy. After some refinement, I also was able to target a captured orbit with a periapsis similar to the orbital radius of Laythe. From there, it's easy to get a low-energy intercept on the next orbit with just a couple small correction burns at periapsis and apoapsis.

Busy airspace (or, spacespace?) around the Tylo gateway.
Using gravity assist captures off Tylo, or in a few cases off Laythe itself, my average Δv from low Kerbin orbit to low Laythe orbit was about 3475m/s, with a tolerance of about ±350m/s. This is quite a bit below the 4360m/s you get from the subway map, which would have been cutting it very close for some of my ships. As it is, all of the robotic fleet made it to low Kerbin orbit with fuel to spare and without having to do any aerobraking. Assuming all the Δv saved went into accelerating Tylo (and it wasn't on rails), its apoapsis would be raised by about 1nm.

Getting to Laythe is not the same as landing on Laythe, though. It's a water world with only a few islands to target. I've landed there before, using a custom deorbit burn tool to target the island on the equator with the flattest terrain. To hit that island, it makes sense to burn over the small island that's about 90º west of there. I set up each ship in a near-circular 100km equatorial orbit and then start a burn just as the ship passes over the coast of that island:

Laythe deorbit burn over the small island on the equator, to hit the flat island about 90º to the east.
After the burn, the lander can ditch its propulsion module (which is mostly empty now and will burn up separately) and prep for entry. For the first phase of the landing, an inflatable heat shield protects the descent package from the initial atmospheric heating.

Landing Phase 1: Using an inflatable heat shield to protect the payload while bleeding off some speed.
As the air gets thicker, the drag on the heat shield overcomes the ability of the reaction wheels to keep it facing forward, so the lander flips around. The fairing still provides thermal and aerodynamic protection for the payload, and the heat shield now becomes more of an air brake, bleeding off even more speed in preparation for the final descent.

Landing Phase 2: The craft flips around, with the heat shield now acting as an air brake.
At about 3km AGL, the speed is low enough to jettison the fairing and deploy the main parachutes. The heat shield stays attached until the main chutes deploy, at which point it can be jettisoned in a controlled orientation so it doesn't crash back into the ship.

Landing Phase 3: Fairing jettisoned, main chutes deployed, heat shield dropped.
Finally, at about 300m AGL, the descent engines kick in and bleed off the final bit of vertical velocity. They don't have much fuel, so the burn has to be timed pretty well. I use the AeroGUI's AGL indicator and the lander's shadow to judge it.

Landing Phase 4: Powered descent. Kicks up a good amount of sand.
That's how things should go. But the first two landings were not quite perfect. I nearly overshot the landing zone on the first try, coming down less than 1km from the eastern shore. This is almost exactly where I landed my first Laythe mission, and I knew it was on a major slope. In the process of preparing for a potentially harrowing post-landing slide into the ocean, I forgot a few steps of the landing checklist and the descent engines didn't start up. The resulting ~15m/s impact was enough to break off the mining rig and fuel tank from the first LR1 rover down. But the drivetrain survived, so it could still act as a scout if it could get up the hill.

The first (hard) landing on Laythe in this mission, dangerously close to the shore.
Having nearly overshot the landing zone into the ocean, I tweaked the deorbit burn a little (from 104m/s to 110m/s). However, this was a little too much tweaking and lander #2 wound up heading straight for the lake in the middle of this island. Luckily, this was a HAB1 lander, which has a little more fuel on board for the powered final descent. I managed to just barely hover-translate to the cliff edge overlooking the lake's eastern shore with no fuel to spare.

Landing #2 involved some last-second piloting to steer away from the lake to the edge of a cliff.
Those two landings gave me the upper and lower limits for the deorbit burn. I used 108m/s as the burn for the remaining 12 landers, and they all touched down safely on the relatively flat land between the lake and the eastern shore.

Typical landing zone after dialing in the exact deorbit burn.
I say relatively flat because it's still filled with sand dunes. They're no problem for the 6- and 8-wheeled rovers, but I need a 1-2km stretch of actually flat terrain to use as a space plane runway. I scouted for a while before settling on the strip marked out by the pink markers in the landing photo above. It's about 1.5km long and 300m wide, near the equator, and aligned well for west-to-east landings. It's completely flat in the crosswind direction and slightly sloped upward in the "upwind" landing direction. I'd prefer something flat in all directions, but this is the next best thing.

By the end of the first wave, I could place the landers with about ±2km accuracy from orbit. But they are rovers, so it's easy to reposition them as needed. The LR1s all grouped together to form the corners of the runway, acting as visible markers for the space planes on approach. They're needed at the runway for refueling anyway, so this seems like the best place for them. In order to avoid excessive part counts in one location, I decided to move the HAB1s, the colony habitats, away from the runway and toward the lake. There, they could be assembled into housing groups.

Setting up some modular housing on the dunes.
It's not a metropolis, but having a mobile and reconfigurable colony seems ideal on the sand dunes of an otherwise pretty desolate water planet. In total, 13.5 of the 14 rovers in the robotic fleet made it to the surface, and all 14 were able to find their way to each other and remotely set up the infrastructure for a colony. It'll be another year before the colony ships arrive in the second wave, but when they do, they'll have a place to stay - with a nice view.


Monday, May 27, 2019

KSP: Laythe Colony Part 3, The Colony Ships

Jool Launch Window #2 is all about getting as many Kerbals in transit to Laythe as possible, and that means building a fleet of colony ships. This was actually the first ship designed for this mission, but I only built one as a proof-of-concept before committing to the Robotic Fleet for Launch Window #1. Those habitats, rovers, and relays will arrive first to pave the way for the colony ships.

The colony ships are built in orbit, with each part launched separately on the same heavy-lift boosters that sent up the Robotic Fleet. The core of each ship, around which the rest of the ship is built, is a Passenger Module:

The Passenger Module
The Passenger Module has room for 18 Kerbals (half the crew of each ship), with two main living compartments on each end, a central stack of general purpose seating, and two observation domes. It's meant to be the "comfortable" portion of the ship, to make the multi-year journey more bearable than would be possible in a lander cockpit. Not that Kerbals really care.

One of the main quality of life considerations for the colony ships is the ability to spin to generate artificial gravity in some of the living quarters. For this reason, the rest of the ship is built along an axis passing through the center of the passenger module. Forward, the next part is the Docking Module:

The Docking Module
While it has space for another six Kerbals, the Docking Module is more of a working space than a living space. Since it's on the central axis, there's no artificial gravity. But it has a large science lab and common area for the crew. Most importantly, it serves as the docking interface for the Space Planes, which shuttle crew to and from the colony ships.

The Space Planes
The Space Planes are really the key to this entire mission, providing a way to get hundreds of Kerbals down to Laythe without having to exactly target flat landing sites from orbit. I tweaked and tested the design to the point where getting to orbit, docking with a colony ship, and returning to Kerbin for a runway landing was utterly routine. Each colony ship required four Space Plane round-trips and two one-way trips to fully crew. The two one-ways go with the ship to Laythe, where they will be used to ferry Kerbals down to the surface.

The back-to-back docking configuration for the Space Planes minimizes the moment of inertia along the spin axis. The two planes have to be exactly symmetric, so each interfaces with two medium-size docking ports for alignment. It is possible, with careful flying, to get both ports to engage at the same time. In addition to enforcing symmetry, this makes the final structure much more rigid. Finding parts that are exactly the right spacing on both sides to make this possible was the trickiest part of the design.

I could write an entire post about the Space Plane design, but I think I'll just post some pictures and videos of it kicking ass instead:


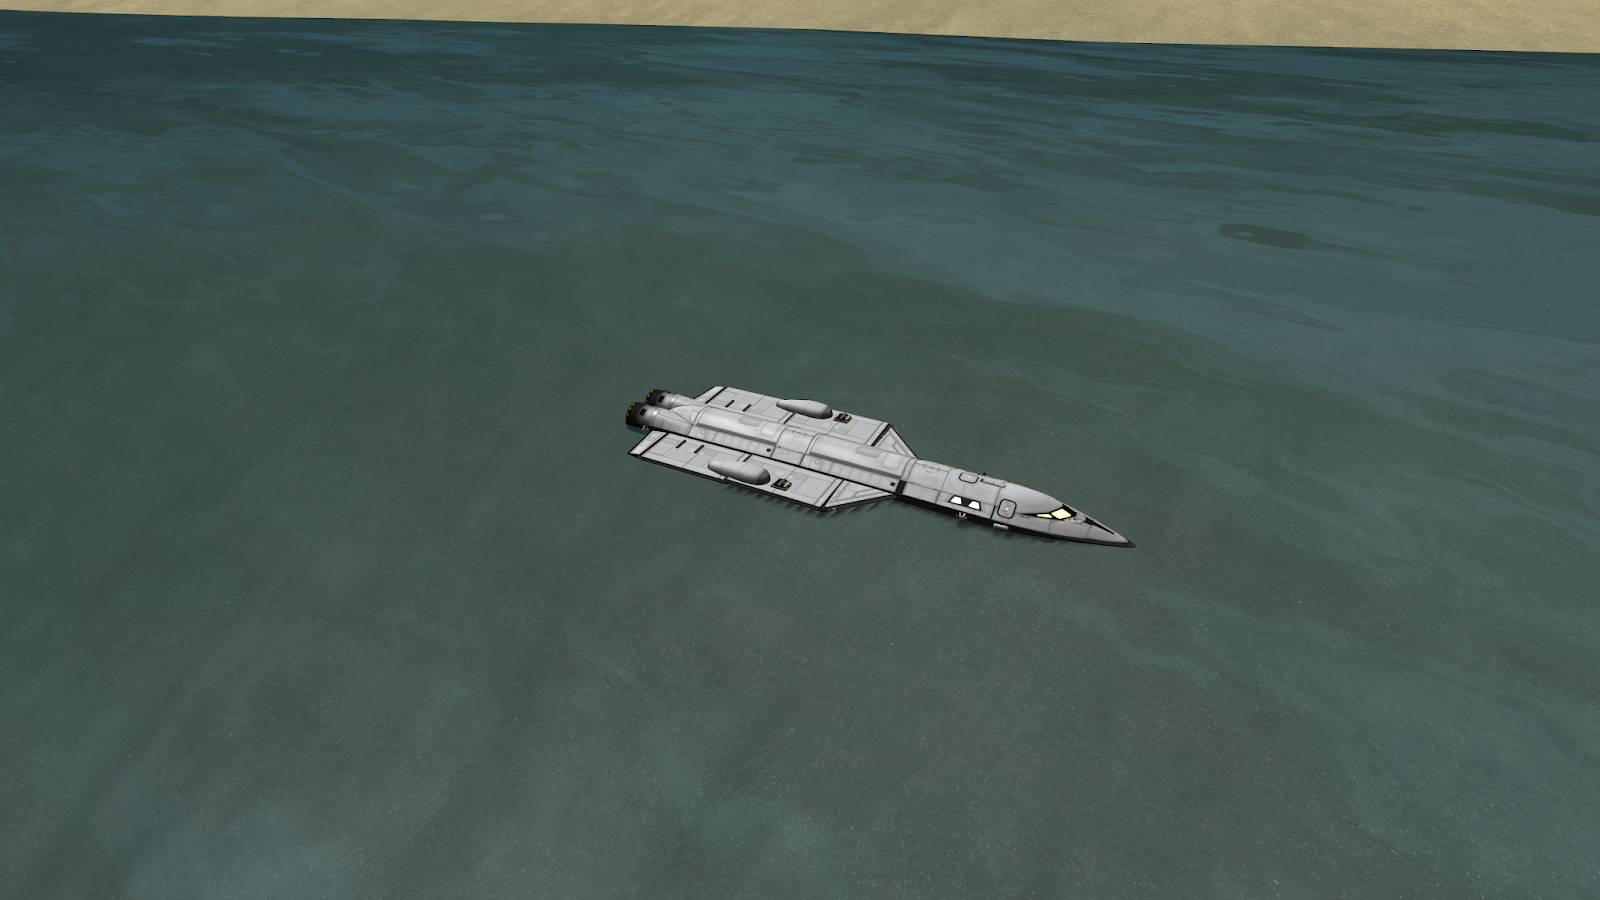
The last picture has a story that goes with it: For some reason, after dozens of clean flights, I botched a take-off and slammed back into the KSC runway with the gear still down, breaking off both wings, the outer engines and fuel tanks, the vertical stabilizers, and all but the two inner horizontal control surfaces. The fraction of a plane that was left was somehow still able to gain altitude, do a wide 180º turn, and make a water landing just off shore.

Anyway, back to the colony ships. Behind the Passenger Module is a truss structure I just call The Node:

The Node
This is the lightest and simplest part of the colony ship, primarily serving as a connector between the crew stack and the propulsion. It also carries the large solar panels, some battery storage, extra reaction control systems, and side ports for docking other modules, such as for refueling. Altogether a small but important building block.

To push all this, three Propulsion Modules are launched separately and docked to the back of the Node. These are the full four-engine versions of the propulsion modules used for the Robotic Fleet.

The Propulsion Modules
With 12 engines in total, the colony ships actually have a higher thrust-to-weight ratio than the robotic landers. The entire colony ship, including the two Space Planes, comes in at just under 300 tons and has a fully-fueled Delta-V of about 4400m/s, which should be enough to get to Laythe orbit with just a tiny bit of help from gravity assists off Tylo (or Laythe itself).

The process of building a single colony ship takes 13 separate launches: six for assembly, six crew shuttles (including two permanent ones), and one refueling run. (While the propulsion modules get to orbit fully-fueled, the total Delta-V counts on topping off the two Space Planes.) It's without a doubt the most ambitious in-orbit construction project I've attempted in KSP.


Oh, and I built 10 of these for Launch Window #2. That's about 3,000 tons of hardware, including 20 Space Planes and 360 Kerbals, on the way to Laythe.

196 Days Remain

I had intended for the second launch window to be the last ships out, but my arbitrary deadline of Year 3, Day 0 for the destruction of Kerbin leaves some time to send up a few more. They'll have to wait for the third launch window, possibly in the relative safety of a Minmus orbit, but I can think of a few extra pieces of hardware that would be useful to the colony.

Thursday, November 29, 2018

KSP: Laythe Colony Part 2, The Robotic Fleet and Launch Window #1

In honor of the successful Mars InSight landing this week, I thought I'd do a progress report on my long-term KSP mission to get as many Kerbals off Kerbin by Year 2, Day 0 as possible. Part 1 sets up the premise and the main strategy. In this Part 2, I throw about 1,000 tons of robotic hardware at Jool during the first available launch window, with hopes that at least some of it winds up in a single spot on the surface of Laythe as the seed for a colony.

The busy 1000m/s on-ramp to Jool Transfer Orbit.

The Robotic Fleet

For the first launch window, I decided to send only uncrewed vehicles to feel out the Jool transfer orbit, the details of maneuvering within the Jool system, and the landing procedures at Laythe. The robotic fleet consists of three types of ship: Triple Relay Satellites (RS3), Laythe Rovers (LR1), and Habitats (HAB1). Each one has a different function crucial to settling a remote colony.

RS3

Does this thing get HBO?
These are the smallest and lightest ships, but critical to this first remote-controlled mission phase. One of the relatively new realism additions to KSP is that uncrewed vehicles need to have a line-of-sight communication path back to Kerbin, or to a ship with a crew, in order to maneuver. To achieve this requires lining up a bunch of relay satellites around Kerbin and at other useful locations in the system. 

Each RS3 assembly carries three small relay satellites with their own ion drives. In addition to the ones already parked around Kerbin, two sets of three are on their way out to Kerbin L4 and L5 stations and then eventually other equally spaced points in the orbit. Three more sets are heading out to an intermediate orbit between Kerbin and Jool. And four sets of three are in the fleet heading for Jool, to set up a network around Laythe.

The start of the mission's comms network.

LR1

Practice driving on Kerbin.
The Laythe Rovers are giant 30 ton workhorses. The main function of these 8WD crawlers is to seek out ore to mine and make fuel on Laythe. They each have two large drills, a refinery, and a huge fuel storage tank. They can dock with a parked space plane to refuel it, which is critical for sustaining a link between the Laythe surface and hardware/habitats in orbit.

Landing the rovers is a four-step process. They come packaged in an aero shell with a heat shield, so the initial descent involves just surviving with the heat shield pointed in the right direction. After some time, the drag on the large heat shield flips the package around and the heat shield itself becomes a supersonic air brake, with the aero shell protecting the rover. Once subsonic, the heat shield and fairing are discarded and set of parachutes further slows and rights the rover. Lastly, a set of four rockets slows it to a safe velocity just in time for touchdown.

Step 5 is to quickly deploy the solar panels and drive out of the way of falling fairing debris.

HAB1

Home, sweet home.
The Kerbals can live for extended periods of time in orbit, but having a home base on the Laythe surface will be important for long-term survival. In order to facilitate construction, the surface habitats are themselves rovers with roughly the same chassis as the LR1s. They land the same way and, once on the surface, can drive to each other. This will be important, since the landing target might hundreds of square kilometers.

The habitats are extremely modular. They can be individual homes for a single Kerbal family, including single-passenger mini-rover parked in front. Or, they can be docked together indefinitely to form a larger base, thanks to a central hallway section with docking ports on either end. The slight angle of the hallways allows them to fit inside the aero shell.

How much fuel to bring?

The LR1 and HAB1 landed payloads are both around 28 tons, about half the mass of my first Laythe lander. (That lander had to be heavy in order to have enough fuel to get back off of Laythe, a task to be handled by space planes this time around.) In that mission, two identical ships flew independently to Laythe with an average of about 2500m/s of fuel-burning Δv. But, they also made heavy use of aerocapture at both Jool and Laythe. Without that, it would take something more like 4360m/s to get from low Kerbin orbit to low Laythe orbit, according to the amazing KSP Subway Map.

With a known Δv requirement, figuring out how much fuel to bring is simple. With the 800s specific impulse of the LV-Ns, the minimum wet to dry mass ratio is:
So, the ships need to carry about 3/4 ton of fuel for every one ton of dry mass. Not too bad, since the same heavy lifter that carries up the packaged landers can carry up an equivalent mass of LV-N engine, fuel tank, and liquid fuel. Thus, each robotic lander requires two separate launches:

First, a heavy lift booster hauls the lander payload in its aero shell into orbit.
These are the unsung heroes of the mission, relentlessly hauling all the more exciting hardware into orbit.
Next, a second booster brings up a propulsion module, with LV-Ns and a lot of liquid fuel.
Just remember to check yo' staging...
The two meet in orbit and create a transport ship with a wet to dry mass ratio of about 1.775, for a Δv of about 4500m/s.

Rendezvous between an LR1 lander package and its propulsion module.
A total Δv of 4500m/s is cutting it a bit close, but they would only need a small amount of aerobraking or Tylo gravity assist to gain back a comfortable margin. There's also a good amount of RCS fuel on board that can be dumped (in a prograde or retrograde fashion) near the end of the trip if it's not needed. Additionally, the RS3 ships have a lot of fuel to spare if their propulsion modules can be swapped onto the more thirsty landers nearer to Laythe. The wet to dry mass ratio of the fleet as a whole has a comfortable margin.

Launch Window #1

The first Jool launch window happens around Day 190 in-game. (The simple and more complex online calculators both agree to within a few days).  Up to that point, I spent time refining the landers and practicing the landings on Kerbin. But once the designs were locked, the push began to assemble the fleet in orbit. 

The practical limit on fleet size is how many ships can be juggled during the actual launch window. In order to boost the wet to dry mass ratio, these ships have the two-engine version of the propulsion module, which gives them a somewhat low thrust to weight ratio. The ~2000m/s ejection burn had to be split into two parts: one into a 10-day elliptical orbit and a second to escape onto the final Jool transfer. Even still, the burns were 10 minutes each, so the ships had to be spaced out so they would reach their final periapsis burn at reasonable intervals.

Also, it would be nice if they didn't hit the Mun on their way in.
After the final burn, the transfer takes over two Kerbin years, meaning Kerbin will have been destroyed by the time the first ship even arrives at Jool. The lander designs can never be tweaked, and the crewed fleet will have to set out with no guarantee that there will be a base waiting. No pressure.

Lots of empty space to cross now.

661 Days Remain

With the first 18 ships on their way to Jool and then Laythe to set up base, the priority shifts to getting Kerbals off-planet. This means mass-producing and then filling the immense colony ships, which are the most intricate builds I have attempted in KSP yet.

More to come...

Sunday, August 6, 2017

KSP: Laythe Colony, Part 1

A while back, I read a book called Seveneves, by Neal Stephenson, and found it to be immensely entertaining. The premise is that, for unknown reasons, the moon explodes and humanity has two years to get off the surface of the planet before the pieces crash into it. What I particularly enjoyed is that it's set in the near future, so we only have the tools we have now to work with. One of those tools is the International Space Station, which becomes the hub of a permanent space habitat. With no budget constraints and no point in risk aversion, a convincing amount of hacking manages to throw lots of hardware into space in a short period of time. And it falls on a few people to figure out what to do with all of it, since no viable long-term mission plan is proposed by ground leadership, who have other concerns. (Just go read it!)

You know who else has no budget constraint and no concept of risk aversion? The Kerbals! I decided a fun challenge would be to see how many Kerbals I can get off-planet in two (Kerbin) years, with the ultimate goal being to land them on Laythe and set up a colony. Laythe's atmosphere, while not directly breathable by Kerbals, has enough oxygen for jet combustion. And there is plenty of water.

Like, seriously a lot of water.
It's been a while since my Kerbals first carried out a mission to Laythe and back. Making a precision landing on Laythe's sparse, sand dune-covered islands was a challenge, especially with a top-heavy vertical lander. In order to establish a colony, Kerbals and equipment will have to meet at a single location on the surface of Laythe, so a better approach is needed. For the passengers, this means riding down on one of these:


This space plane uses four CR-7 R.A.P.I.E.R engines, hybrid engines that switch from air-breathing to closed-cycle at altitude. So, it takes off like a jet, builds up as much speed and altitude as it can, then switches to rocket propulsion to reach orbit. KSP's aero model was entirely redone for v1.0 and onward, making atmospheric flight both more realistic and more difficult. But this plane can still ferry six Kerbals into Low Kerbin Orbit (LKO) with a bit of fuel to spare.

It's also surprisingly sporty.
The Kerbals can't ride space planes all the way to Laythe, though. Well, they can if you build one like this. But I can barely get my six-passenger one into orbit so I'll need a more suitable living space for the passengers on the long cruise to Laythe. This led me to build my first true space station in LKO:

Finally a place to park all my space planes...
I wanted it to be modular and symmetric so it would be easier to add a propulsion stage for the long journey. This meant docking two space planes, and after some thought I decided they should be back-to-back to minimize the inertia on the long axis. (Any guesses as to why I would want to do that?) The planes are docked with two ports each for precise alignment and more rigidity.

The T-shaped station is actually launched into orbit in two pieces. The docking module attaches to the space planes, while the crossbar of the T is the main passenger module, where the Kerbals will ride out the long trip. The passenger module will become the hub of a much larger ship once propulsion is added on opposite the docking module.

Getting pieces this large into orbit is the work of a new two-stage heavy lifter.

No, the first stage is not recoverable.
The first stage is powered by five RE-M3 Mainsail engines, and includes all eight side-mounted fuel tanks and the bottom central fuel tank. The second stage is just a single tank and Mainsail. Together, they can hurl about 50t into orbit. Except for the space planes, every piece of hardware that goes to Laythe will start out mounted to the top of one of these ascent stages.

And there are many more pieces of hardware required to make the trip. The main strategy will be to send a crapload of unmanned stuff (rovers, habitats, and utility vehicles) to Laythe during the first launch window (~184d in) and then follow up with a fleet of passenger ships, based on the station above, during the second launch window (~1yr, 225d in). But, since KSP has added an element of realism in that unmanned craft need communications to be remote controlled, a network of relay satellites is also needed. All of this also needs efficient propulsion for the long leg of the trip.

More to come...

Saturday, March 15, 2014

KSP: Mission to Laythe (and back).


Mission Summary:
Total M.E.T.: 984 days
Ships: 4 (2 to Laythe, 1 landed)
Crew: 12 (6 to Laythe, 3 landed)
Landed Mass: 56 tons
Furthest Distance from Kerbol: 82,000,000 km
Orbital Rendezvous: 4 (two in low Kerbin orbit, two in low Laythe orbit)
Quicksave Reloads: 4 (two game bugs, two landing retries)

After a nearly 1,000-day mission, I've successfully returned six Kerbals, including three that have landed on Laythe, to Kerbin. Laythe, the water moon of Jool (KSP's Jupiter analog), is probably the most interesting and challenging target for exploration in the Kerbol system. For that reason, I modified my Interplanetary Transport Ship (and proven Duna lander) to give it more range and more lifting power - just barely enough to pull off the trip...

...they hope.
A single ship would not be able to carry enough fuel to land on Laythe and return. In fact, I determined that even getting from the surface of Laythe back into orbit would require almost all the fuel the lander can carry. In order to have fuel for the journey itself, two ships would have to go. And each of those ships would need to be completely refueled in Kerbin orbit (by two more ships) before heading off. So, the mission as a whole required four ships (twelve crew) and four orbital rendezvous. Basically, lots of docking practice.

One of two Kerbin Orbit Rendezvous.
Docking and refueling in Kerbin orbit is somewhat routine, so I'll skip that part and focus on the bulk of the mission, which really has four parts: 1) Kerbin to Laythe, 2) Laythe Landing, 3) Laythe Ascent, and 4) Laythe to Kerbin.

1) Kerbin to Laythe

I've only successfully managed to even get to Laythe once before. Other attempts have been cut short by ship-eating game glitches such as the Deep Space Kraken. This time, I made sure to use quicksaves and also back-up persistent saves so I wouldn't be screwed if my ships randomly blow up in deep space.

Shit happens.
Game bugs aside, getting to Jool is not particularly challenging. According to the map, it takes about 1915m/s of Delta-V to get from low Kerbin orbit to Jool intercept. This is assuming an optimum Hohmann transfer orbit, which can be planned using this handy tool. The transfer orbit looks something like this:


Both of my fully-fueled mission ships managed the transfer with a Delta-V of about 1975m/s, almost perfect. (Part of the burn was done using the refueling ship to boost its docked fuelee into a more energetic Kerbin orbit. The fully-fueled ship would then detach and finish the transfer burn on its own in subsequent orbits.) Later in the transfer, some smaller course correction burns add a bit more to the total Delta-V required to get to Jool. But ideally, once a Jool encounter is achieved, very little additional fuel should be necessary to slow down, get captured by Jool, and ultimately, transfer into a Laythe orbit. Since both Jool and Laythe have atmosphere, this can mostly be done with well-targeted aerobraking.
Lucky Tylo slingshot. Remember kids: always aerobrake in the counter-clockwise direction.
Aaaaaahhhhhhhh!
I tried a couple different techniques for aerocapture and aerobraking: using Jool's atmosphere to slow down into a less energetic Jool orbit and using Laythe's atmosphere for a direct aerocapture into Laythe orbit. Which is better depends a lot on the direction of Laythe in its orbit relative to yours: if nearly parallel, less energy is required to aerocapture and it could be a good opportunity to do so. If you are approaching Laythe at a right angle, it might be better to wait for a better opportunity and aerobrake more at Jool instead. In either case, it's important to always approach Jool in the correct orbital direction (counter-clockwise, viewed from above) so that you're not setting yourself up for a head-on Laythe collision.

Ship #1, aerobraking away from Jool "set". 
Ship #2, aerobraking into Jool "rise".
The two ships took slightly different amounts of course correction and tweaking to get to Laythe. (In a few cases, an aerocapture was not completely successful and some fuel had to be burned to slow down to less than escape velocity.) But most of the fuel for this leg of the journey is just spent setting up the transfer. Here's a summary of the outbound trip for both ships:


Once the ships had both arrived in low Laythe orbit, it was time for the third rendezvous of the mission (the first between these two ships) in order to refuel the one that would become the lander. The second ship stays in orbit around Laythe and retains just enough fuel for the return trip to Kerbin.

First Laythe Orbit Rendezvous. 
2) Laythe Landing


I already outlined my landing strategy in this post, which includes my precision deorbit simulation tool. So here I can just review how it actually went.

Not well.
Actually, the deorbit tool worked perfectly - it was the ship design that was fundamentally flawed. With full fuel, the lander is severely top-heavy and can only tolerate at most a 10-15º incline. Lacking sophisticated tools such as ground slope radar and any spare fuel to make last-minute adjustments, the Kerbals really have no choice about where exactly they land, and even the flattest continents on Laythe are covered with fairly steep sand dunes.

But, it's a damn water wold and I managed to hit land three times in a row. In all three cases, the Kerbals survived the landing, but in the first two attempts, the ship fell over and was destroyed. Rather than assigning the Kerbals colonial status, I used up two quicksave retries and finally stuck the landing on the third try.


...just barely.
Other than the two tip-overs, landing went almost exactly as planned. The deorbit tool provided an almost pin-point landing site prediction, the parachutes (drogues first, then main chutes) worked fine and slowed the lander to about 21m/s terminal velocity. The last quick burst of power to slow the ship to safe touchdown speeds was done from the in-cockpit view, so that I could look at the radar altitude and really be efficient with when to start the quick burn. As a result, it used only 1.9 tons of fuel, about as good as my best practice runs on Kerbin. (I allotted for 2-3 tons to be used for deorbit and landing.) The remaining lander, still almost fully fueled, weighed in at about 56 tons. It truly is a behemoth of a landing craft, but that's what it takes to get three Kerbals back into Laythe orbit.

...maybe.
3) Laythe Ascent

The ascent from Laythe was the most uncertain portion of the trip. Laythe is 4/5ths the size of Kerbin, and has a surface gravity of 0.8g. Consequently, it's a bit easier than Kerbin to launch from the surface into orbit, but not by much. And it's impossible to practice this stage of the flight, other than to launch from Kerbin. (This vehicle cannot reach Kerbin orbit, or even come close, so that test isn't very conclusive.)

The original ship (ITS1), which successfully landed at and returned from Duna, had one central "Poodle" engine and four super-efficient but low-thrust LV-N's. The biggest modification to ITS2 was replacing two of the LV-N's with LVT-30's, to increase the lift-off thrust-to-mass ratio of the lander to about 1.2g (1.5x Laythe gravity). Without this modification, it would have had no hope of getting off the surface. The LVT-30's burn through their fuel quickly, though, and get staged after about 90 seconds, according to my ascent simulator:

Laythe ascent profile. (Stage definitions here.)
After the LVT-30's and their fuel tanks are gone, the ship's thrust-to-mass ratio dips sharply (still greater than 1x Laythe gravity, barely). The two LV-N's and single Poodle struggle along to get it faster and higher. Finally, the Poodle runs out of fuel (it doesn't get jettisoned, though) and the LV-N's finish off the ascent. By this time, the thrust-to-weight is well below one, but that's okay because the rocket is moving fast enough sideways that the ground  is falling away from it. (Or at least, that's how I think about it.)

Laythe ascent speed and altitude.
By the end of the ascent, 400 seconds after lift-off, the ship should be in a stable circular orbit, hopefully at or above 75km, with about two tons of fuel to spare. Or so the theory suggests. Time to try it out!

Returning to the ship after one last look at the terrain.
Nighttime launch. Stage 1: All five engines at nearly max power.
Stage 2: LVT-30's and their fuel tanks are jettisoned, LV-N's and Poodle still firing.
Stage 3: Poodle engine shutdown, LV-N's efficiently finishing off the circular orbit, into a beautiful sunrise.
And, back in orbit!
For once, something worked exactly as planned on the first try. Well, not exactly: the actual final orbit was at about 120km instead of 75km. But I can't complain about extra energy. The fuel remaining was also right on target or slightly higher than two tons. Rather than burning some of it to get back to 75km where the orbiting sister ship was parked, it made more sense to bring the sister ship up to 120km. (If you're planning to leave orbit anyway, it always makes sense to burn pro-grade and increase the overall orbital energy of the lower ship for docking, rather than burning retrograde and decreasing the energy of the higher ship.) The fourth and final orbital rendezvous went without a hitch:

The two ships meet again. Val also making an appearance.
4) Kerbin Return

Here I deviate from my original flight plan a little, because I thought of an even more fuel-efficient way to get back. The original plan was to transfer about 50% of the remaining fuel to each ship, jettison the empty tanks and LVT-30's on the ship that still had them, and have both ship return independently on LV-N's. But this method would still involve carrying a lot of dead weight in the form of mostly-empty fuel tanks and Poodle engines that probably wouldn't get used again. So I came up with a better return configuration:

Fairwell, empty ship!
I transferred all of the remaining fuel into one ship, the lander, which had already jettisoned its LVT-30's during its ascent from Laythe. Then, I cut loose the entire second ship, the orbiter, except for the command pod with its three Kerbals. This newly-lightened single return ship would have plenty of Delta-V, much more than two ships on their own would have had. As an added bonus, I only had to keep track of one ship during the trip back. The down-side is I have left some space junk in Laythe orbit.

Never mind that, though, time to return home. I've done a Laythe direct return before, where I burn out of Laythe orbit directly onto a Jool-Kerbin transfer orbit. It's by far the most efficient way out. I did the math at some point in the past:


You can calculate the launch window and required angle of departure using this calculator. Just put in Laythe's orbital radius as the "parking orbit" for Jool. The time to leave Laythe is when it is at the position in its orbit around Jool that the departure angle represents. Sort-of a hack way to calculate it, but it works. Then all you have to do is exit Laythe's sphere of influence parallel to its orbit, with enough Delta-V to get onto a Jool-Kerbin transfer orbit. It should look like this:

Exiting Laythe SOI parallel to its orbit.
And with the correct Delta-V to get onto a Jool-Kerbin transfer orbit.
And it should take somewhere between 1,000m/s and 1,200m/s of Delta-V, which is remarkably efficient compared to the trip from Kerbin to Jool. It's by far more efficient than diving towards Jool and then doing an escape burn. (Although it wasn't intuitively obvious to me that that was the case - I had to do the math to prove it. Sometimes diving to a lower Pe and then doing a burn from there can be more efficient, I think.) 

Anyway, I royally screwed up the departure by trying to break up the burn into two parts.

Burn #1, to a Laythe Ap of about 2,000km.
Very nice scenic route out, but I forgot how quickly Laythe orbits Jool.
Burn #2...by now Laythe is way off the intended departure angle.
I didn't want to do one long (~8 minute) burn, so I split it into two with one final elliptical orbit of Laythe in between. This could work well, if I had actually planned it correctly. I routinely do this from Kerbin since the required transfer burns are huge and the ships are usually fully-fueled and heavy when they leave. But I forgot that Laythe orbits Jool much faster than Kerbin orbits the sun, so in just a single large orbit of Laythe, it has moved quite far in its orbit of Jool. Enough to severely mess up my departure angle. As a result, I used much more fuel than needed and my transfer orbit came out like this:

Far from parallel to Laythe's orbit = very inefficient.
And I have first thrown myself into deeper space...
So it was a good thing that I had plenty more fuel than anticipated for this leg of the journey. Lesson learned for future trips as well: plan in the extra time for the first burn or just do the entire Laythe departure burn in one go. One unintended benefit of this mistake was that the Kerbals got to see Eeloo, the elusive (oh, I get it now!) Pluto-like outer planet of the Kerbol system:

It's there, I swear. (Click to zoom.)
Anyway, more than a year later, and with a few course corrections along the way to fix my messed-up transfer orbit and get on the right orbital inclination, the Kerbals get their first glimpse of home:


The entire return trip took around 2,000m/s of Delta-V, almost twice what it should take and what it took last time I returned from Laythe. If I had tried the return method using two independent ships, they might not have made it back. As it was, with the single return ship, there was still enough fuel to pull it off. Here's a summary of the return trip Delta-V budget, an extreme worst-case scenario given how badly I messed up the departure angle:


The ship needed to slow down a lot at Kerbin, and it didn't have very much fuel to spare for an insufficient aerocapture, so I made sure to dive pretty deep into the atmosphere, targeting an after-aerocapture apoapsis of about 500km. Usually, my aerobraking spreadsheet tends to overestimate the Delta-V for hyperbolic orbits / aerocapture, so I was expecting to come out quite a bit higher. I had never tested aerobraking with docked ships, so there was also the non-zero chance of complete destruction. But actually, it worked quite well. It even makes sense physically, leading with the heat shield of the docked command pod. KSP doesn't model heat damage at the moment, so it doesn't matter much, but it does look cool:


And the aerocapture worked well, ending with an apoapsis of about 1,000km (less braking Delta-V than prediced, but more than sufficient for capture). Further light aerobraking passes lowered the orbit of the combined ship to about 100km.

The final step was to deorbit the command pods. I chose to do this one at a time. For one, I still wasn't very confident on the aerodynamic stability of the two-pod system. Doing one deorbit burn and then separating them was also out of the question: having two ships in the atmosphere at the same time usually leads to one disappearing forever. I had enough fuel left to deorbit one and then quickly turn around and put the remaining ship back into a parking orbit.

Step 1: Deorbit burn at the target crater.
Step 2: Undock.
Step 3: Turn around and quickly get back into orbit.
 By now I have almost perfected Kerbin deorbit using my precision deorbit calculator and can pretty accurately target a landing just off the coastal location of the Kerbal Space Center.


For the second deorbit, I decided to ride it out inside:


And after almost 1,000 game days and probably around 200 million kilometers of distance traveled, the two ships both landed within a hundred km or so of where they started:

The second splashed down probably 3km from the KSC...
So ends a mostly-successful mission to Laythe surface and back using a ship that wasn't really designed for the task. The technical parts of the mission, precision deorbits to hit what little land there is at Laythe and a first-attempt ascent, both went quite flawlessly based on the two simulators I made to assist. Transfers and aerobraking also went mostly well. The only real failure was the lander design itself - it's just too top-heavy to land on hilly terrain.

Overall, while it is immensely fun to plan and execute a mission with such little margins for error in terms of fuel, it's also time-consuming and tedious sometimes. Additionally, even if the lander could tolerate steeper inclines, this method of Laythe landing restricts landing sites to a location somewhere on the equator within roughly a 5º margin of error from the deorbit burn. There's no opportunity for exploring the surface, or even landing two or more ships in the same place. Every bit of fuel is needed for the ascent, so powered or rocket-guided descents are out of the question.

So a new, more flexible transport system between Kerbin and Laythe will be required for a sustained presence there. Larger transport ships and permanent refueling stations around Kerbin and Laythe are part of this. But most importantly, a new method of getting down to the surface and back up will be required. And towards that goal, I'll end with this teaser: